Zerto Disaster Recovery
Introduction
SDDC Enterprise customers can optionally add Disaster Recovery services to their SDDC deployment. DR Services are offered in two tiers - an initial tier which provides customers with the essential features they need to replicate and failover their VM workloads between vCenters, and a premium tier which offers additional features including the use of consistency groups and continuous data protection.
Zerto is the product used to provide the premium tier of DR services and offers the following features:
- Continuous Data Protection with near-zero data loss or downtime
- Group common VMs into protection groups for application failover
- VM failover and test failover options
- Migration of protected virtual machines between vCenters
- Self-service protection and failover
- Customization of VM networking and storage options
- Near-zero RPOs and granular failover options
This document will provide details on how to configure and manage VM replications in SDDC -Enterprise using Zerto.
Applicable to
This document is applicable to SDDC-Enterprise deployments.
Before You Begin
Before you begin working with Zerto, please be aware of the following:
- Zerto uses VMware vCenter for authentication and authorization. So please ensure your vCenter user account has been added to the relevant groups for access to Zerto. If you're not sure, please contact Rackspace Support who can check your permissions.
Accessing the Zerto
All administration of your environment is performed from the Zerto Virtual Manager (ZVM) web-based interface.
To access the ZVM interface:
- Open a web browser and navigate to https://:9669
- The ZVM details should have been provided to you by Rackspace at the time of SDDC handover. If you're not sure what they are, please contact Rackspace Support who can confirm them.
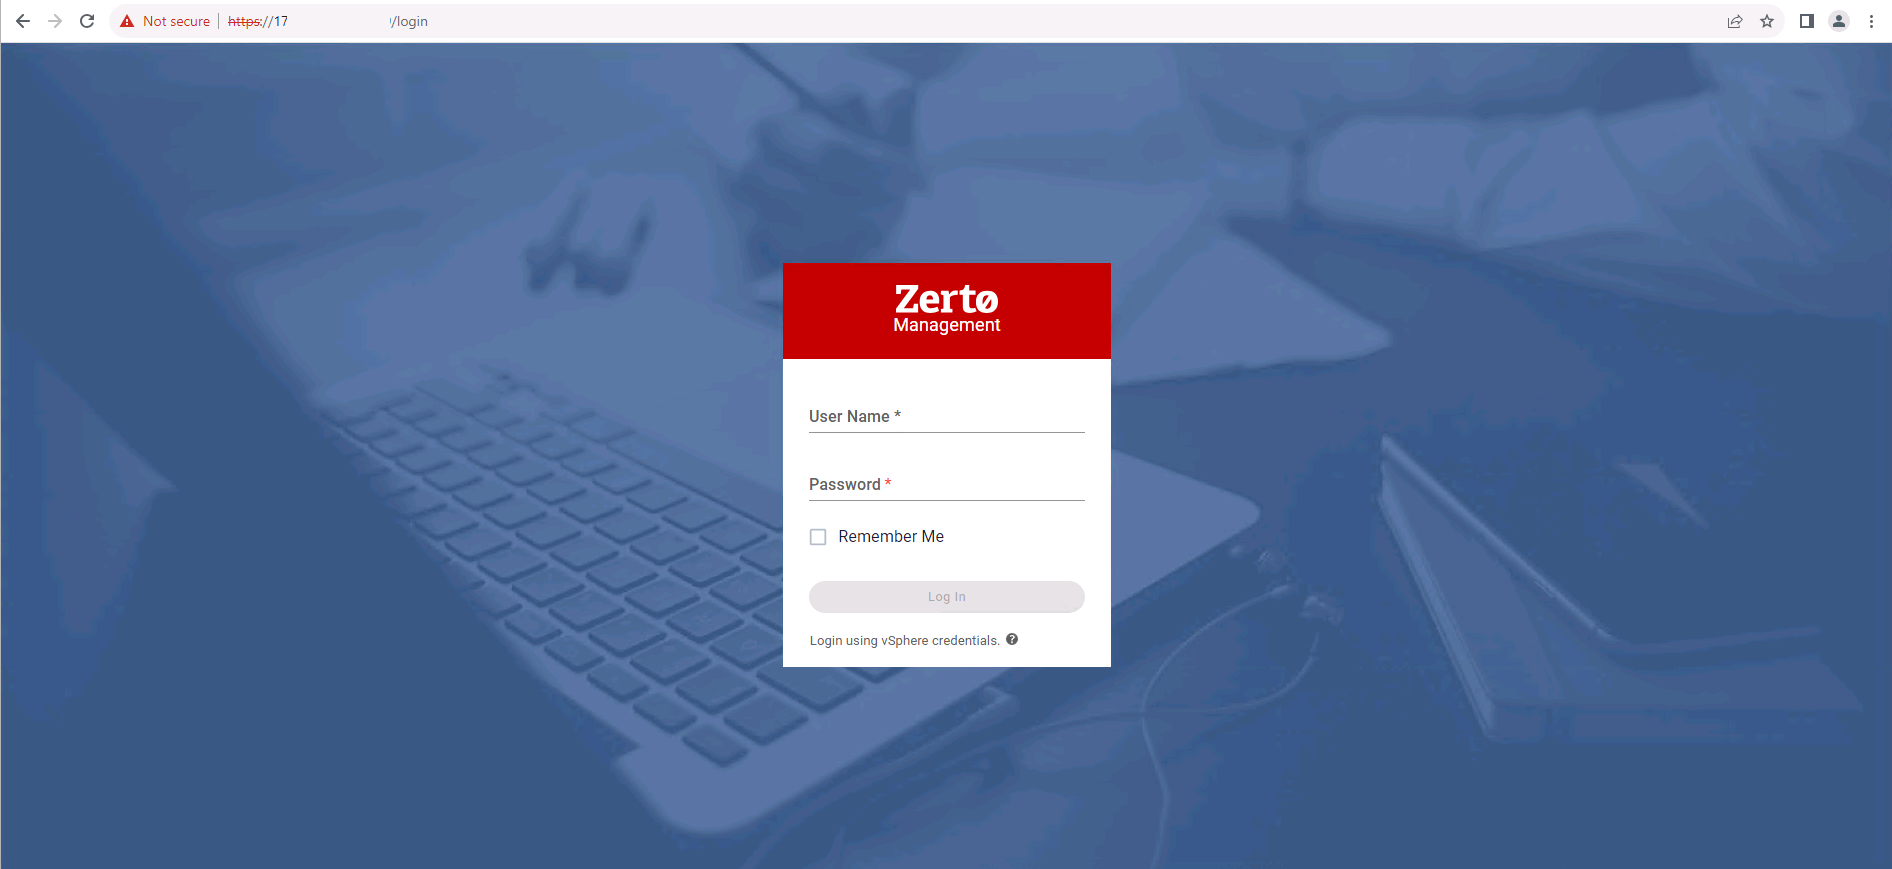
- Enter your username and password and then click Log In.
Zerto uses the same credentials as vCenter. So, make sure to login using your vCenter username and password.
i. If you do not have access, please contact Rackspace Support who can verify your user account has the relevant permissions.
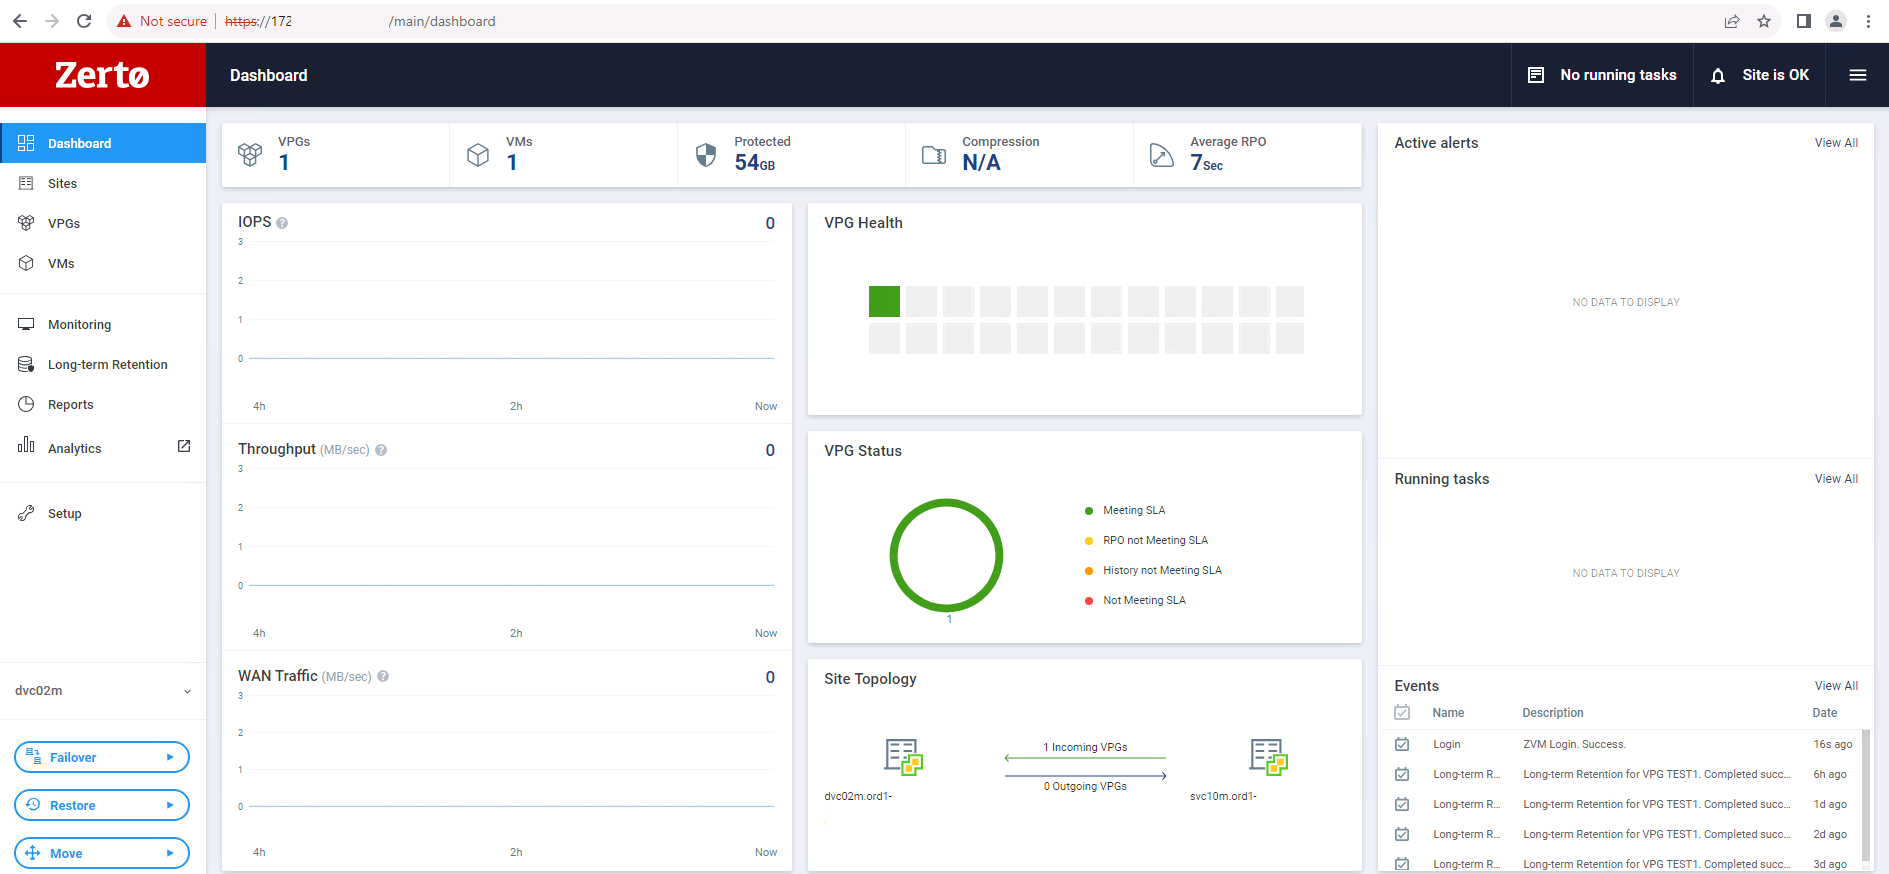
- The main ZVM dashboard will then be displayed.
Configuring VM Replication
To configure your VMs to replicate to the recovery site with Zerto you must create Virtual Protection Groups (VPGs) and add your VMs to them.
VPGs allow you to group protected VMs together with a common set of replication and recovery settings and fail them over to the recovery site as a group - specifying the boot up order as required. This is a great way to protect an entire application under a single group and fail it over together rather than as a series of individual VMs.
To create a VPG please do the following:
- From the Zerto interface, click VPGs in the left-hand menu to open the VPG tab.
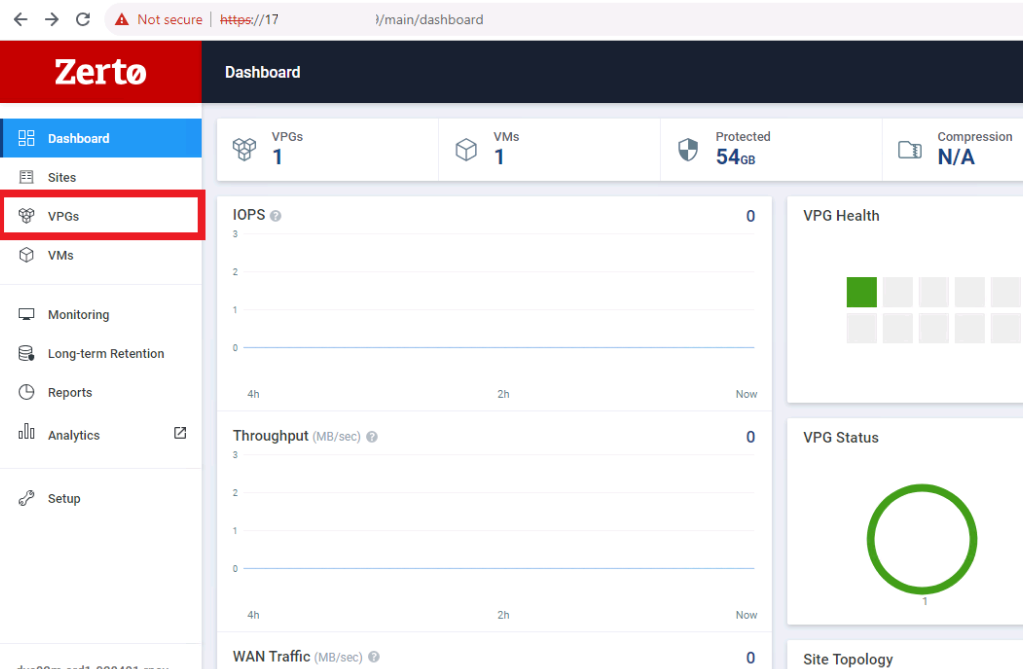
- In the VPGs tab, click the New VPG button. The Create VPG Wizard will be displayed to guide you through the required steps to configure a VPG.

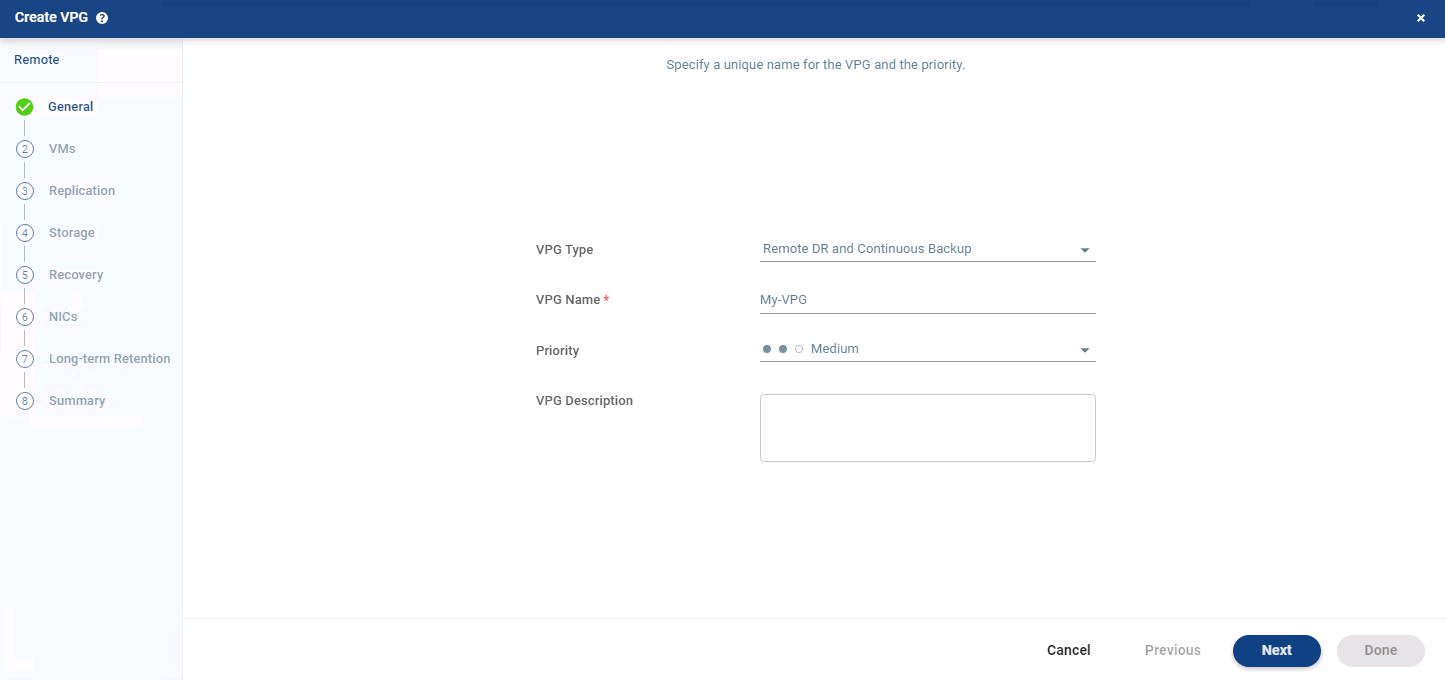
- On the General page of the Create VPG wizard enter:
- VPG Type: Set to Remote DR and Continuous Backup
- VPG Name: A meaningful name to identify your VPG.
- Priority: Set the data transfer priority of this VPG in relation to other VPGs in your environment when there is limited bandwidth between the source and recovery sites.
- VPG Description: Optional description
Click Next.
- On the VMs page, select the VMs you wish to include in your VPG and replicate.
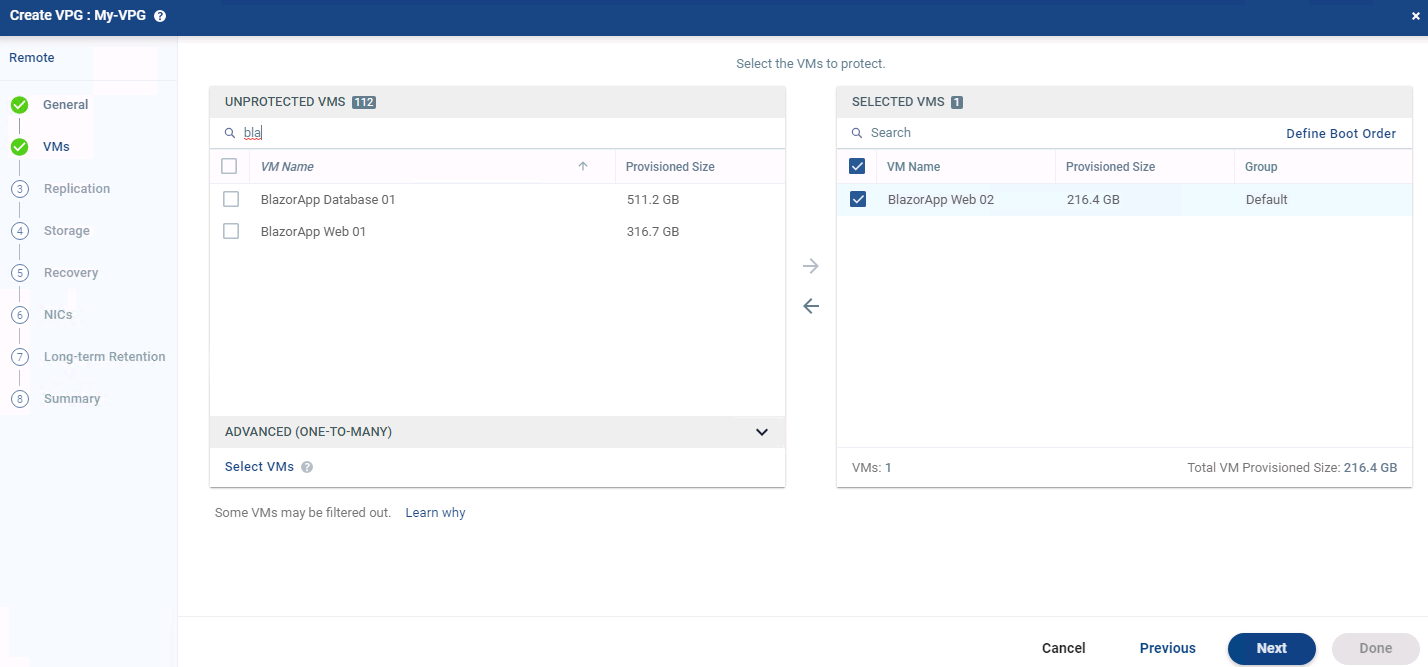
i. Mark the checkbox next to the VMs you wish to replicate in the Unprotected VMs box and click the arrow pointing to the Selected VMs box.
The search bar in the Unprotected VMs box can be used to filter the list of VMs.
ii. Use the Define Boot Order button in the Selected VMs box to set the required startup order of the VMs in the VPG on recovery.
a. you can optionally create "groups" of VMs in order to startup multiple VMs at one time before moving to another VM or group of VMs.
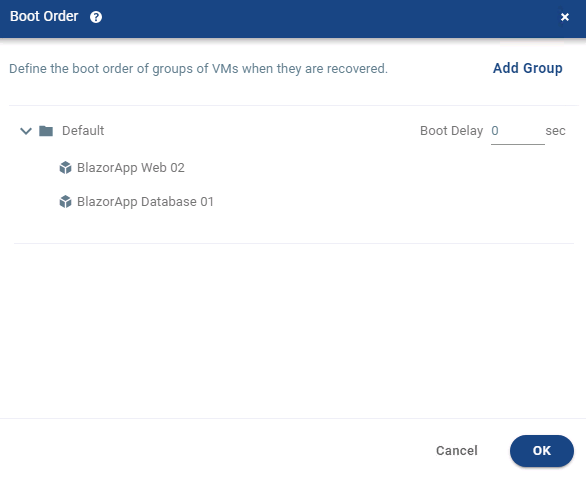
Click Next.
- From the Replication page of the wizard, use the drop-down Recovery Site list to select your recovery SDDC site. Once selected additional options will be displayed underneath.
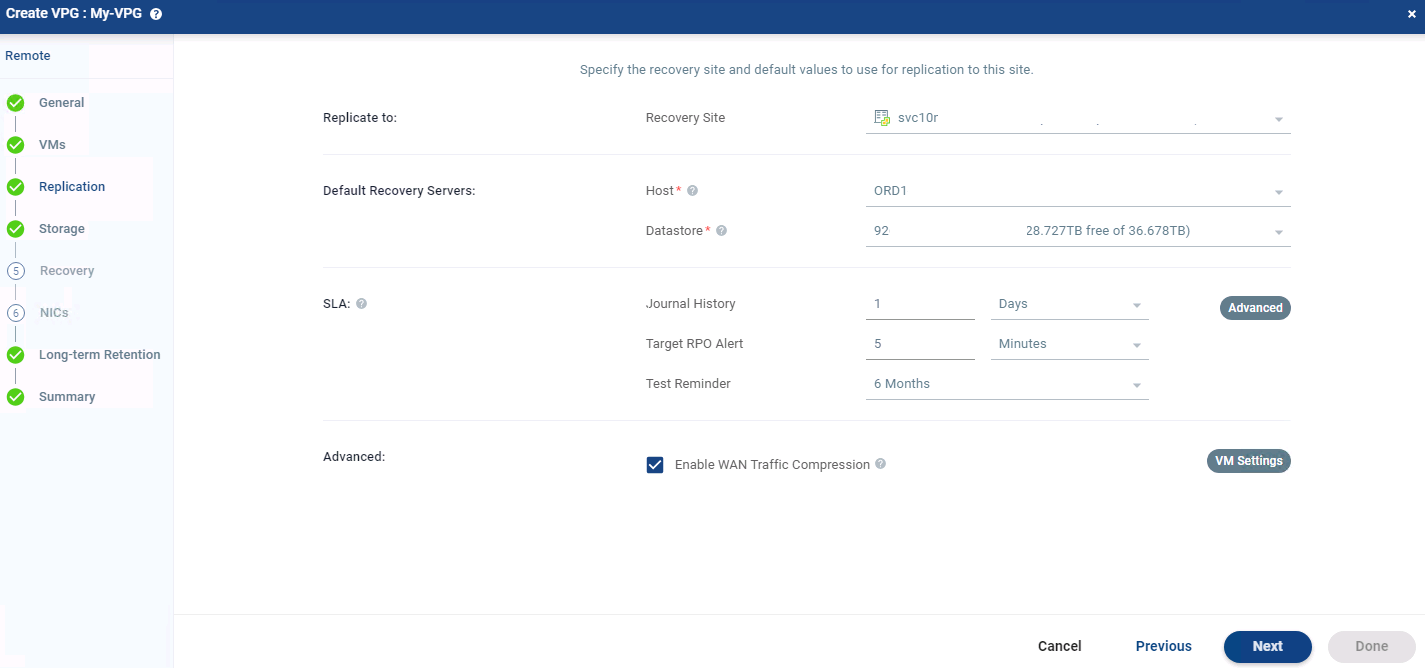
i. Default Recovery Servers
a. Host: Select the cluster, resource pool or specific ESXi host at the recovery site to replicate the VMs to
b. Datastore: Select the datastore to use for the recovered VMs.
Datastores can only be selected once the host field has been populated.
ii. SLA:
a. Journal History: Configure the target journal history for this VPG.
a. This is the time that all disks write commands replicated by Zerto will be retained at the recovery site. The longer the duration, the more storage capacity is required for each journal.
b. For example, if you wish to retain 5 days' worth of VM data changes at the recovery site, set the journal history to be 5 days.
In order to prevent your recovery site datastores becoming full, Zerto journals are configure with a hard capacity limit. If the rate of change of the replicated VMs is sufficiently high, it is possible for the journal capacity limit to be hit before the required journal history is stored.
b. Target RPO Alert: Zerto continuously replicates VM data changes to the recovery site and will attempt to do so at the lowest RPO it can. Set a value here to create an alert in the Zerto UI if the RPO Zerto is achieving is higher than your target RPO.
c. Test Reminder: It is good practice to test failovers on a regular. Set a value here to create an reminder alert in the Zerto UI if this VPG hasn't been tested for X amount of time.
Both the journal and VM settings can be overridden at a more granular level using the Advanced and VM Settings buttons. Using the Advanced button allows you to configure the required journal hard capacity limit and a warning threshold. Additionally, you can configure an alternative datastore on which to store the journal files if you do not want to store them with the recovery VMs.
When ready, click Next.
- Use the Storage page to override the default recovery datastore locations and settings for each replicated VM. Click NEXT to continue.
- On the Recovery page, select the default recovery options:
- Select the default virtual port groups to be assigned to VMs when performing live failover/moves and when performing test failovers.
- Select the default VM folder in the recovery site vCenter inventory in which Zerto should place the VM objects during recovery.
- Use the VM Settings button to set this per VM if required.
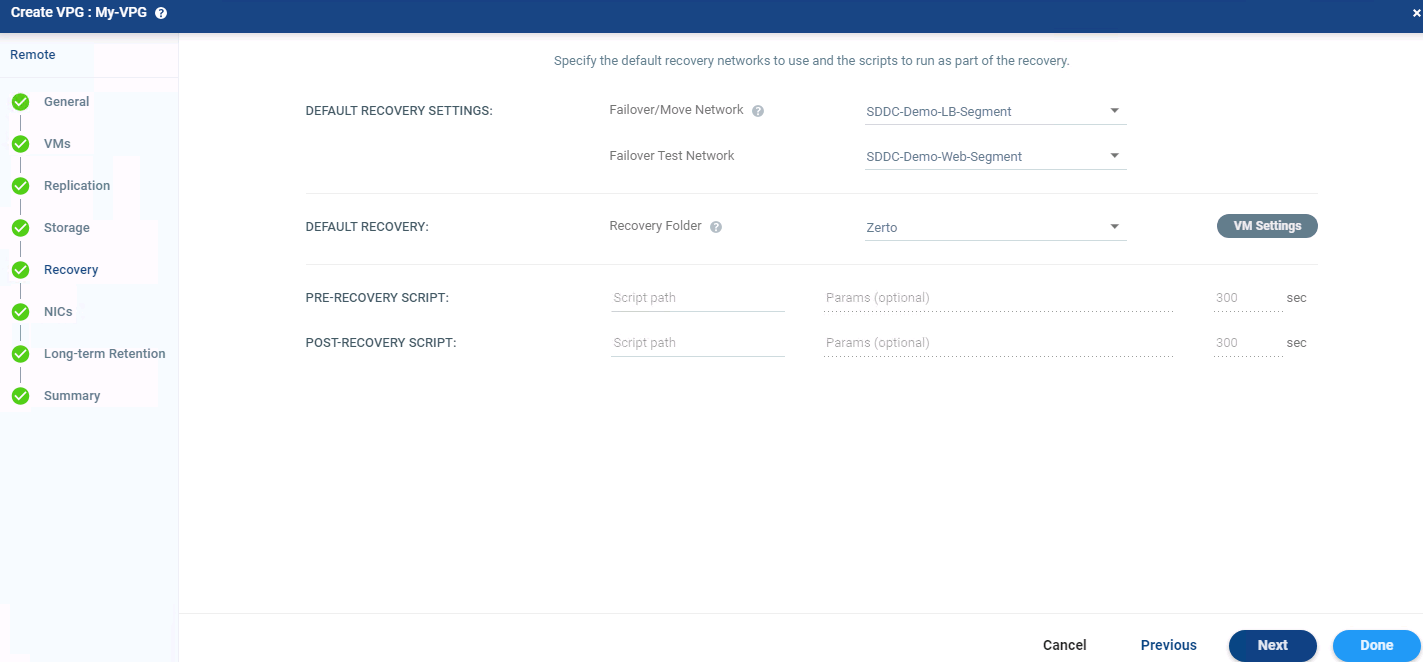
Click Next to continue.
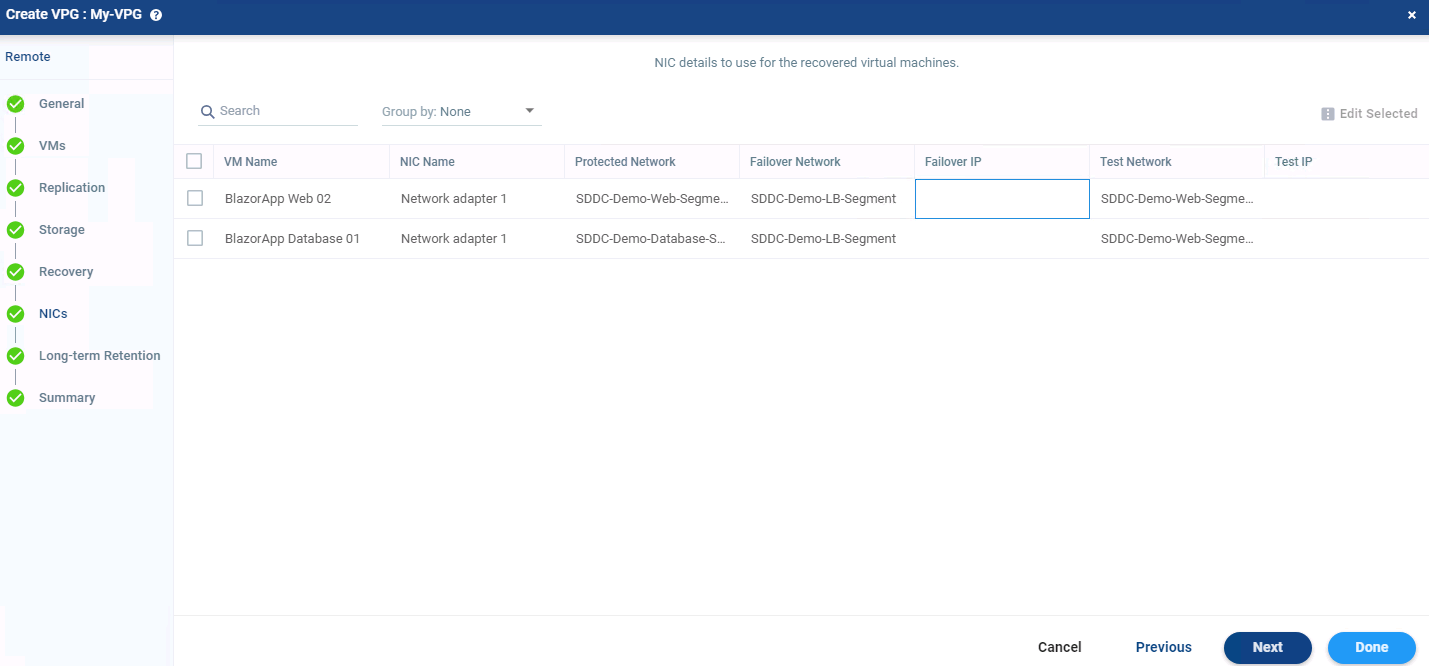
- Use the NICS page to granularly configure Failover and Test port groups/networks for each VM's vNIC. By default, the default options selected on the Recovery page will be selected for each vNIC.
- If IP customization is required, click in the Failover IP and/or Test IP field for the appropriate VM to open a sub-menu. This will allow you to configure the required IP address, subnet mask, and default gateway for the VM's vNIC.
- On the Long-term Retention page click Next to continue. LTR is currently not available in SDDC- Enterprise.
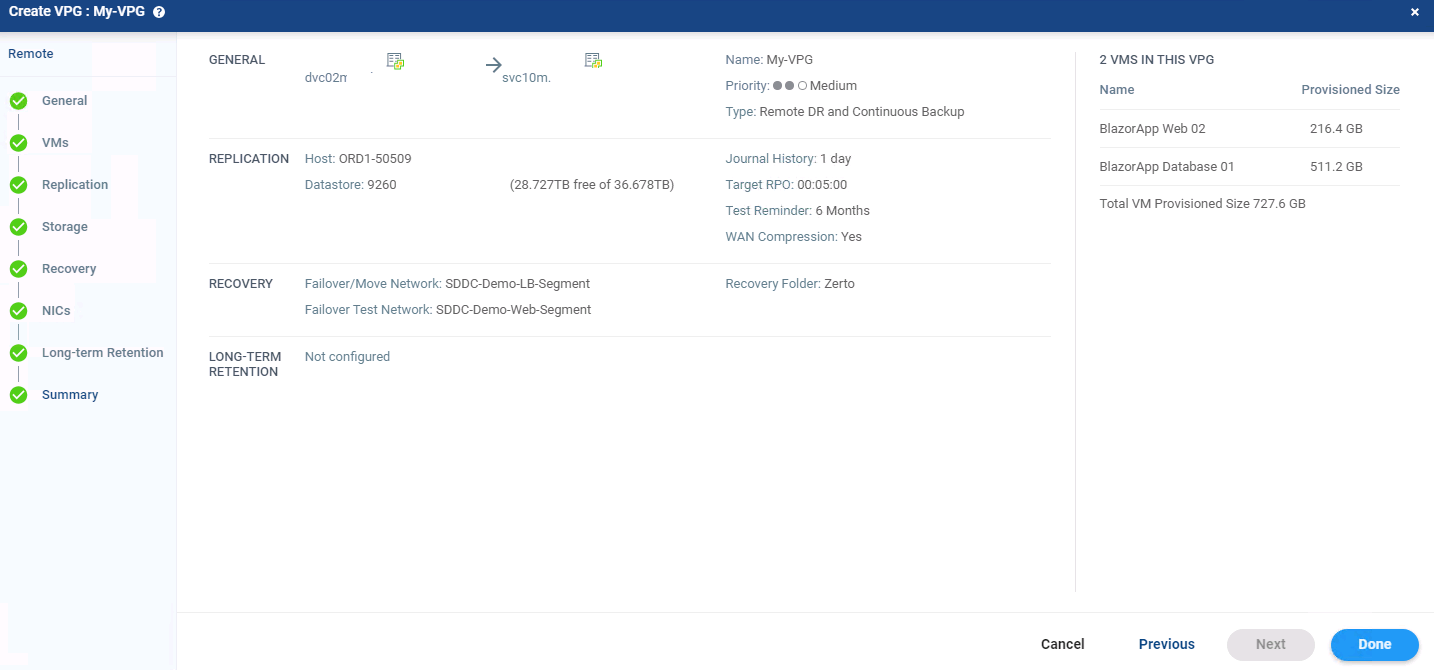
- Finally, on the Summary page review the configuration and when ready click Done.
The VPG will then be created and an initial synchronization of the protected VMs to the recovery site will be performed. This can be monitored from the VPGs tab in the ZVM UI.

Failovers and Moves
Zerto can be used to perform 3 types of failovers:
- A live failover operation targeted for DR events when the protected SDDC site is no longer available, and you need to bring your VMs back online immediately at the recovery site.
- A test failover operation which can be done to prefer for a real DR event. Performing a test failover can utilize a different set of networks than those configured in your VPG configuration for a live failover. This allows the VMs to be brought online at the recovery site whilst leaving the protected VMs unaffected and maintaining replication of those protected VMs to the recovery site.
- A move operation, where both protected, and recovery sites are still available, and you want to move a live VM from one to the other.
The procedure to perform these 3 different types of failover operation are all very similar. The following steps includes details for all 3 failover operations; however, the screenshots will be specifically for the Live Failover option.
- Open the ZVM UI at the recovery site for your replication.
- To perform a Live Failover or Test Failover, click the Failover button in the bottom left section of the ZVM interface and select Live or Test from the pop out menu.
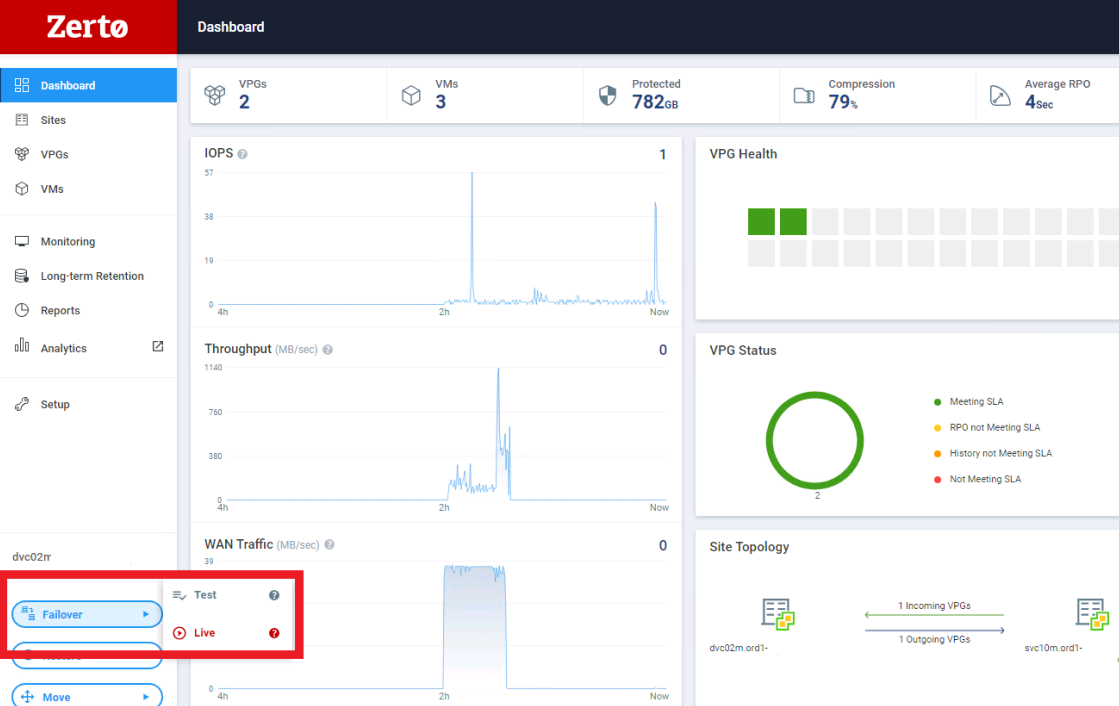
ii. To perform a move operation, click the Move button in the bottom left section of the ZVM interface and select VPG from the pop out menu.

The failover or migration wizard will open.
- From the Select VPGs pane, mark the checkbox next to the VPG you wish to failover or move and click Next.

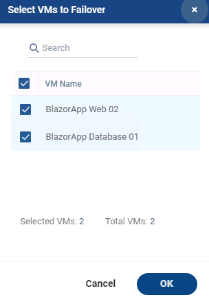
(Live or Test Failovers Only) You can optionally failover specific VMs in the VPG by clicking the arrow button on the VPG Name.

This will open a pane to allow you to select specific VMs to failover.
- On the Execute Parameters pane, configure the settings for the failover:
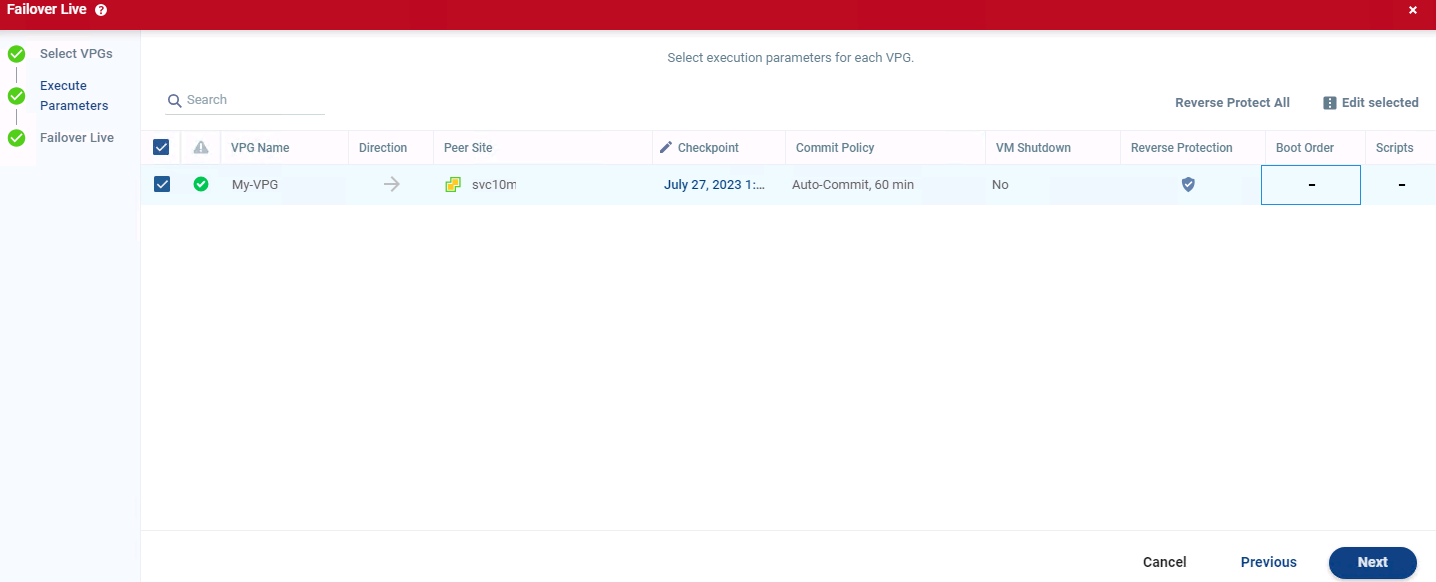
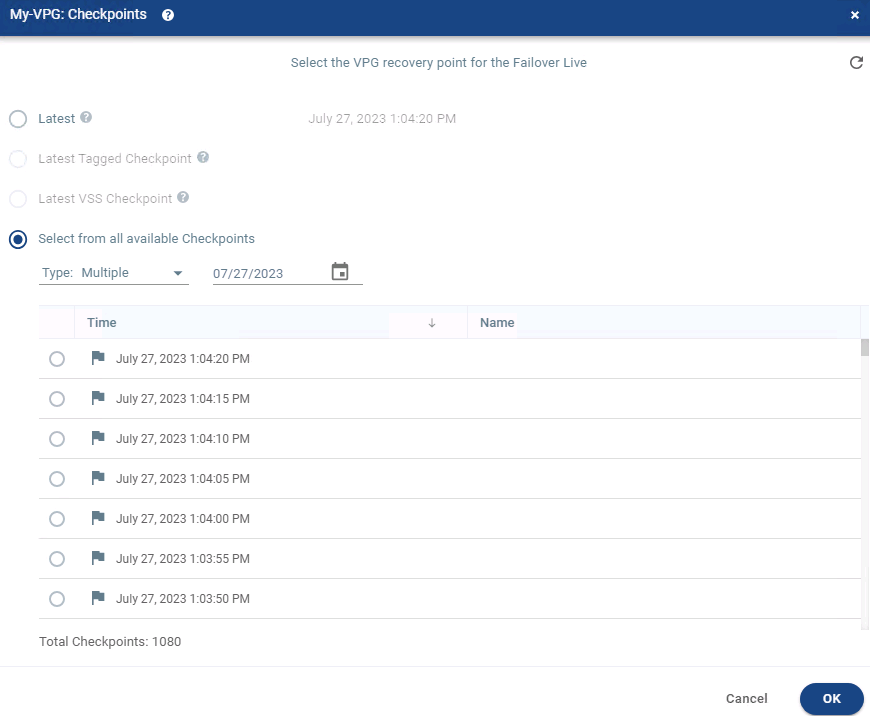
i. Click Checkpoint to select the checkpoint to use for the failover. As Zerto replicates data changes to the recovery site it takes checkpoints at regular intervals to provide options for failover. These are similar to point-in-time views of your replicated VMs.
ii. (Live Failover and Moves Only) Commit Policy: Following failover to the recovery site, Zerto provides the option to test the recovered VMs before committing to the failover. This is done using scratch volumes which store any changes made to the recovered VMs whilst being tested. The scratch volumes are located on the same datastores defined for the journal. Once testing is complete you must either commit or rollback the failover in the Zerto interface. When committed the VMs will move to use their permanent storage, any changes stored on the scratch volumes will be committed to the permanent storage, and the scratch volumes removed.
a. Set the Commit Policy to None if you want to manually commit or rollback the failover.
b. Set the Commit Policy to Auto-Rollback and enter the desired number of minutes to delay that rollback to allow for testing. After the delay timer expires Zerto will automatically rollback the failover unless manually committed.
c. Set the Commit Policy to Auto-Commit and enter the desired number of minutes to delay that commit to allow for testing. After the delay timer expires Zerto will automatically commit the failover unless manually rolled back.
iii. (Live Failover and Moves Only) Reverse Protection: If the protected site is still accessible, Zerto can optionally replicate the failed over VM back to the original protected site following recovery. Reverse Protection is enabled by default for Move operations.
iv. (Live Failover Only) VM Shutdown: Choose whether Zerto should attempt to shut down the protected site VMs prior to carrying out the failover. This may not be required if the protected site is disconnected due to a DR event, but if the protected site is still accessible it may be desirable to have Zerto orchestrate the power off of the source VMs. Options for this are:
a. Yes: Zerto will attempt to gracefully power off the VM using VMware Tools.
b. No: Zerto will not attempt any change to the power state of the source VMs.
c. Force Shutdown: Zerto will power off the source VMs.
v. (Moves Only) Force Shutdown: A move operation all always attempt to gracefully power off the source VMs via VMware Tools prior to moving them to the recovery site. Choose whether Zerto should power them off in the event a graceful shutdown fails.
vi. (Moves Only) Keep Source VMs: Choose whether Zerto should delete the original source VMs following moving them to the recovery site. This option is only applicable if Reverse Protection is disabled.
Click Next when you are ready to proceed.
- Finally, on the Failover Live pane, click Start Failover.
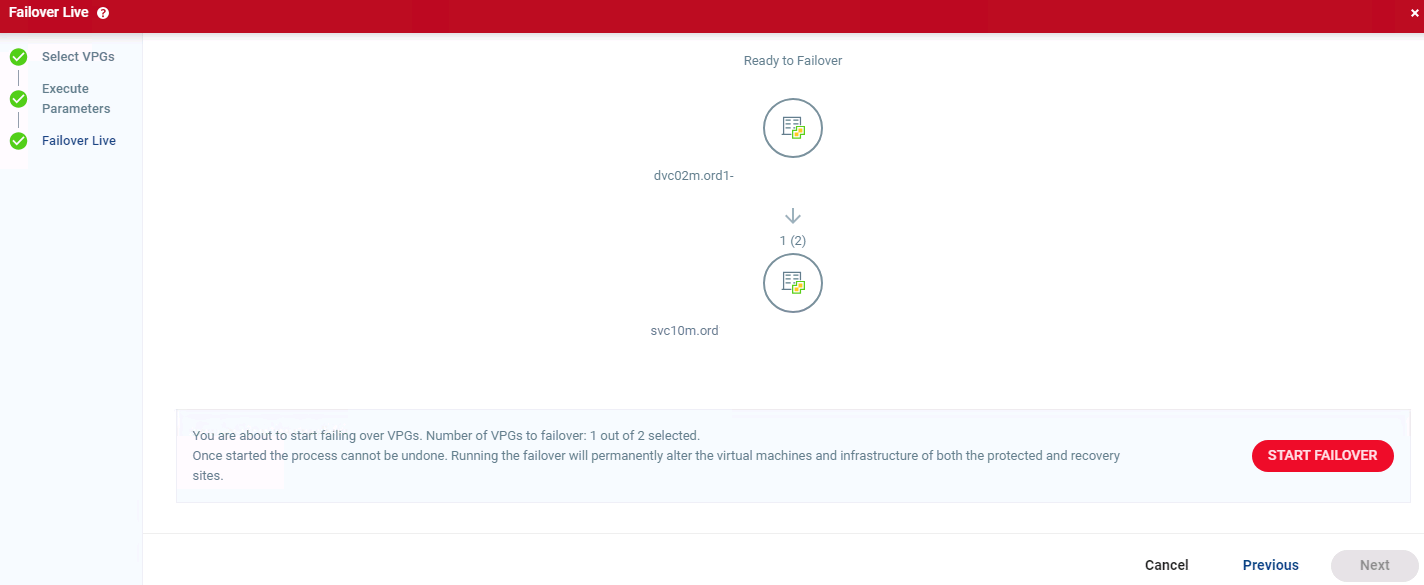
(Live Failover and Moves Only) Depending on the Commit Policy settings you may receive a warning to remind you to commit the failover following testing.
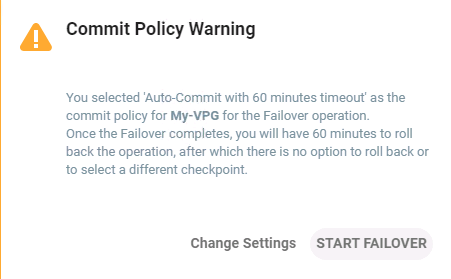
Click START FAILOVER to continue.
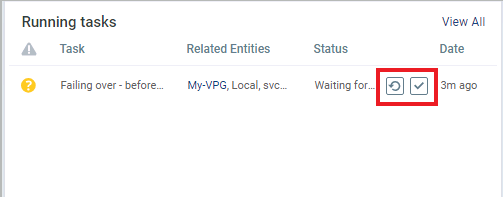
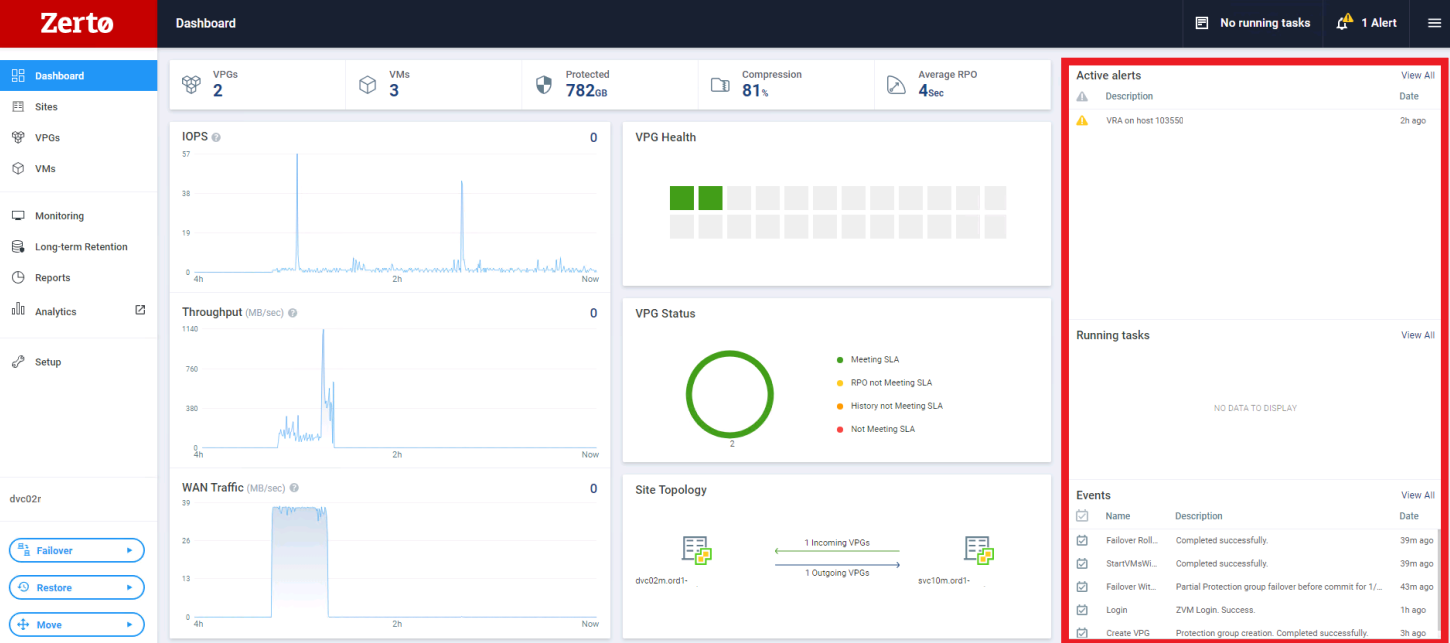
- Zerto will return you to the main ZVM interface and start the failover. You can monitor it in the Running Tasks section of the main dashboard,
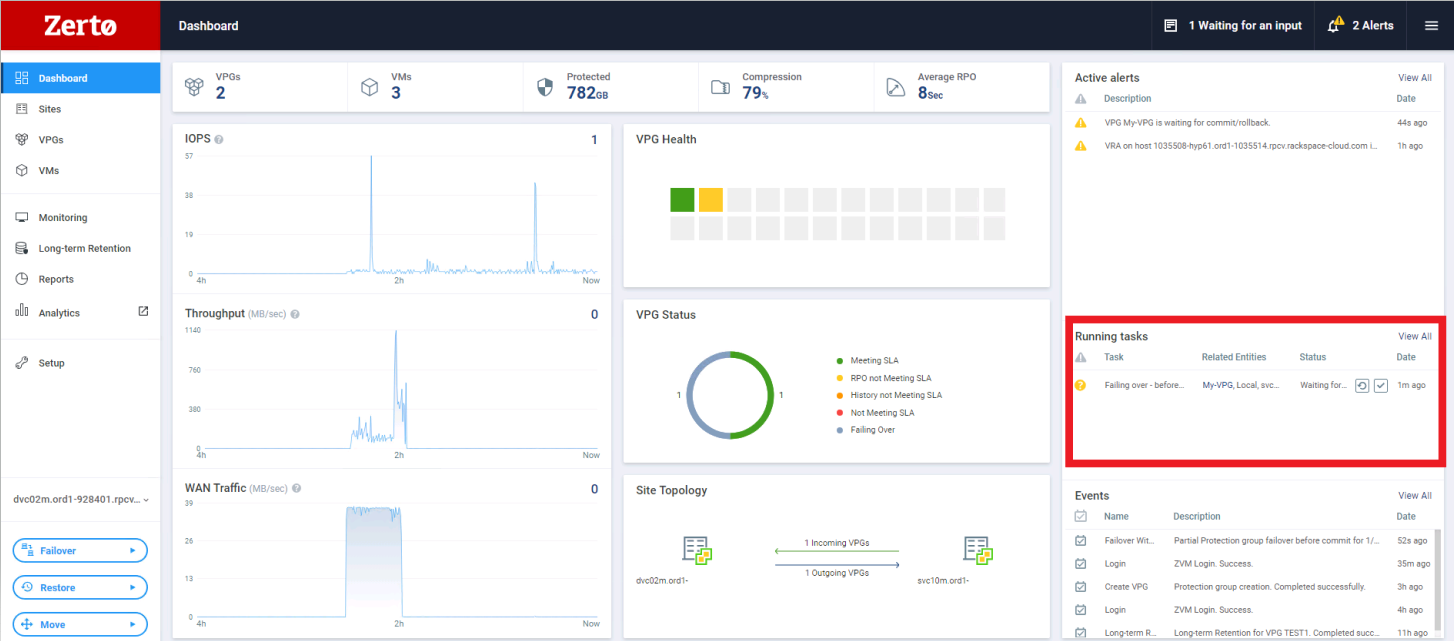
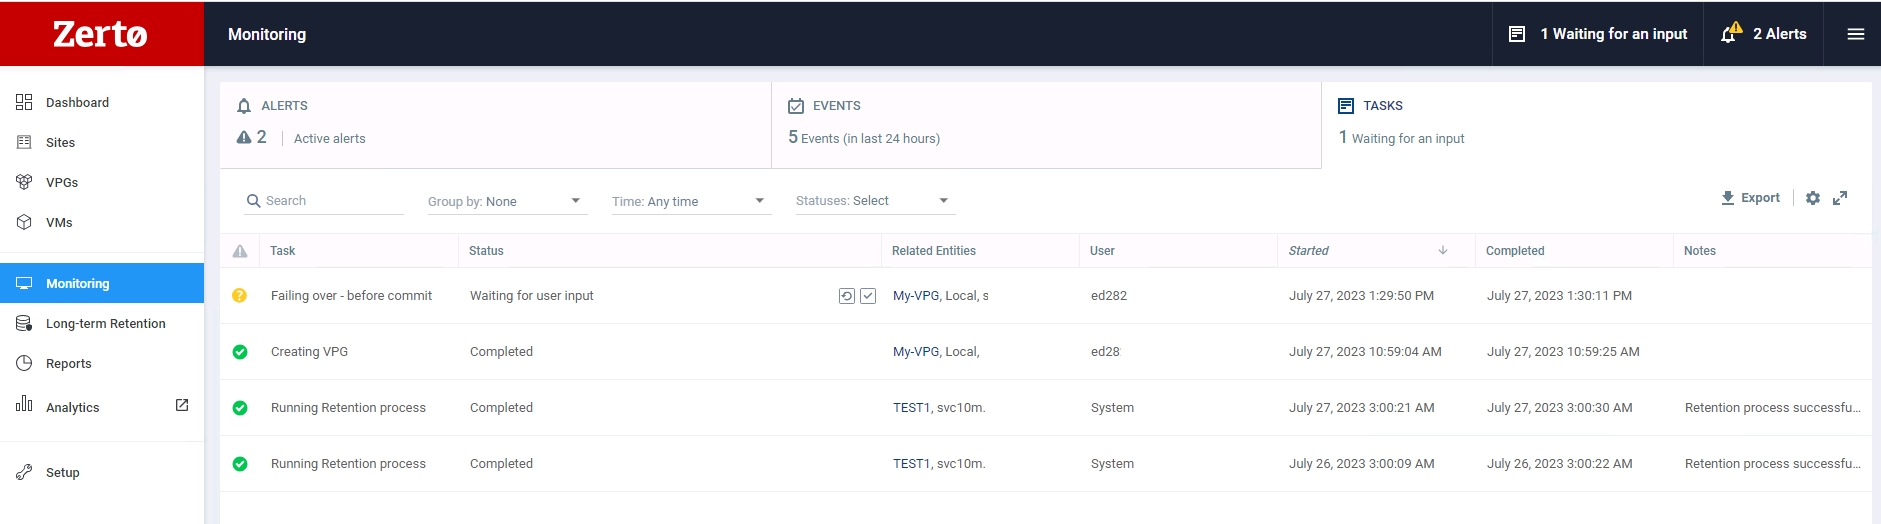
or by going to Monitoring > Tasks
- Once the failover has been performed, the VM will be available in the recovery site vCenter for use.
(Live Failover and Moves Only) Depending on the Commit Policy specified you may need to manually commit or roll back the failover. This is done via the Zerto interface in the Running Tasks section of the main dashboard or the Tasks section of the Monitoring tab.
Monitoring
Checking the status of VM replications
The status of your VM replications can be viewed from the VPGs tab of the ZVM user interface.

From here you can get an overview of each VPG's status, the replication direction (incoming or outgoing), and it's RPO.
To get detailed information, click on the name of a VPG to open a VPG specific information pane.
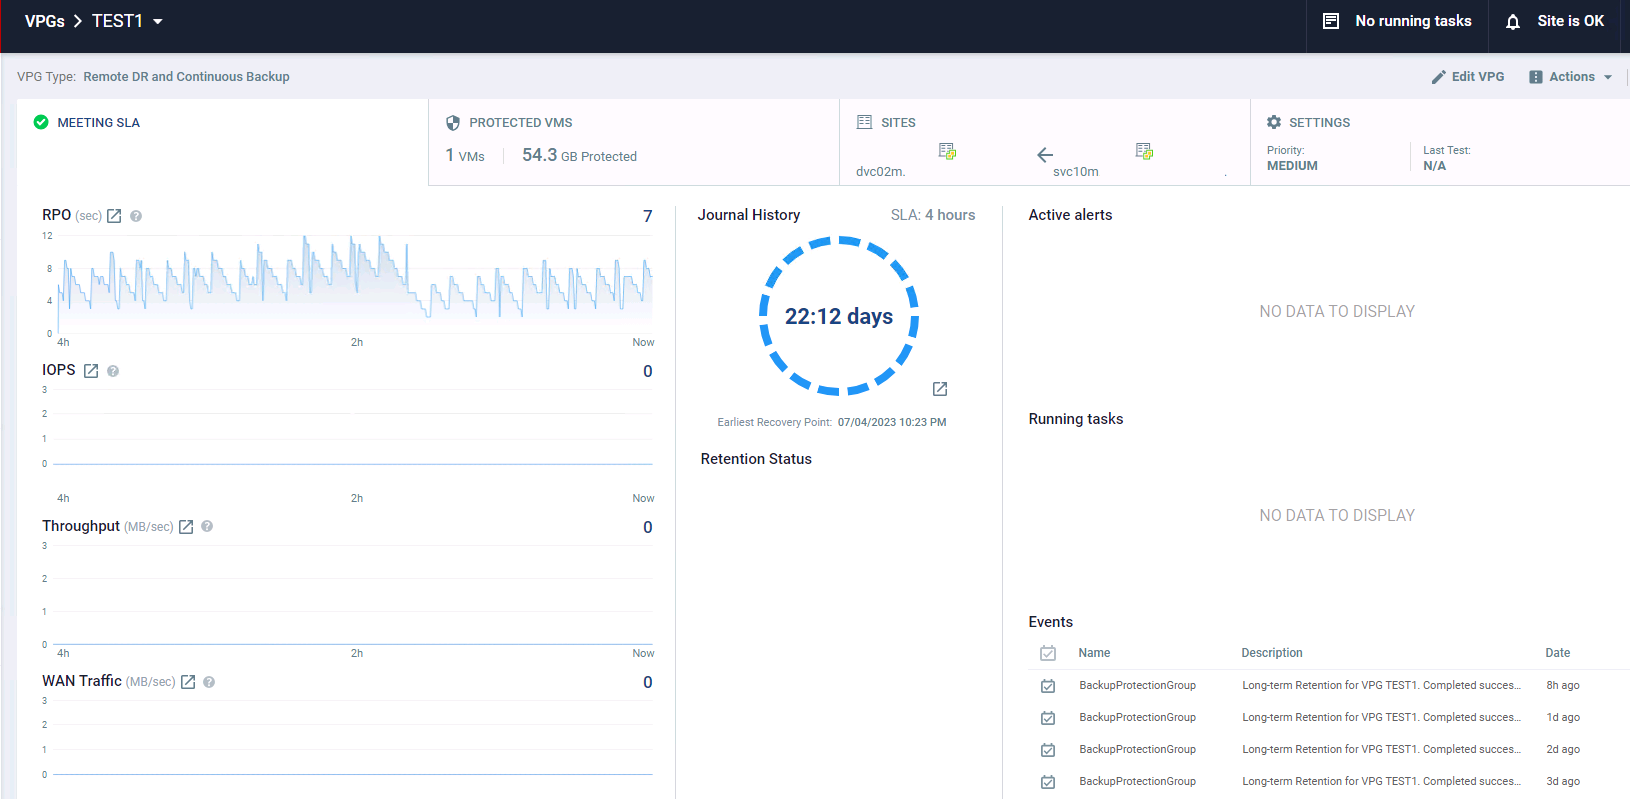
Here you will have access to 4 tabs.
- The first provides details on the overall VPG status. Here you can see the RPO being achieved, IOPS and throughput generated by the protected VMs, and the amount of data replicated over the WAN between sites. This tab also shows you the current amount of journal history retained and the configured SLA (required journal history configured when setting up the VPG), as well as a summary of any active alerts for the VPG.
- The Protected VMs tab displays a summary of the VMs configured for replication in this VM, including their storage use and failover network configuration.
- The Sites tab shows you a graphic depicting the relationship between the VPG and its source and destintion sites.
- The Settings tab provides an overview of all the configuration applied when creating the VPG.
Tasks, Events and Alerts
You can view the recent tasks, events and alerts from the Monitoring tab in the ZVM interface.
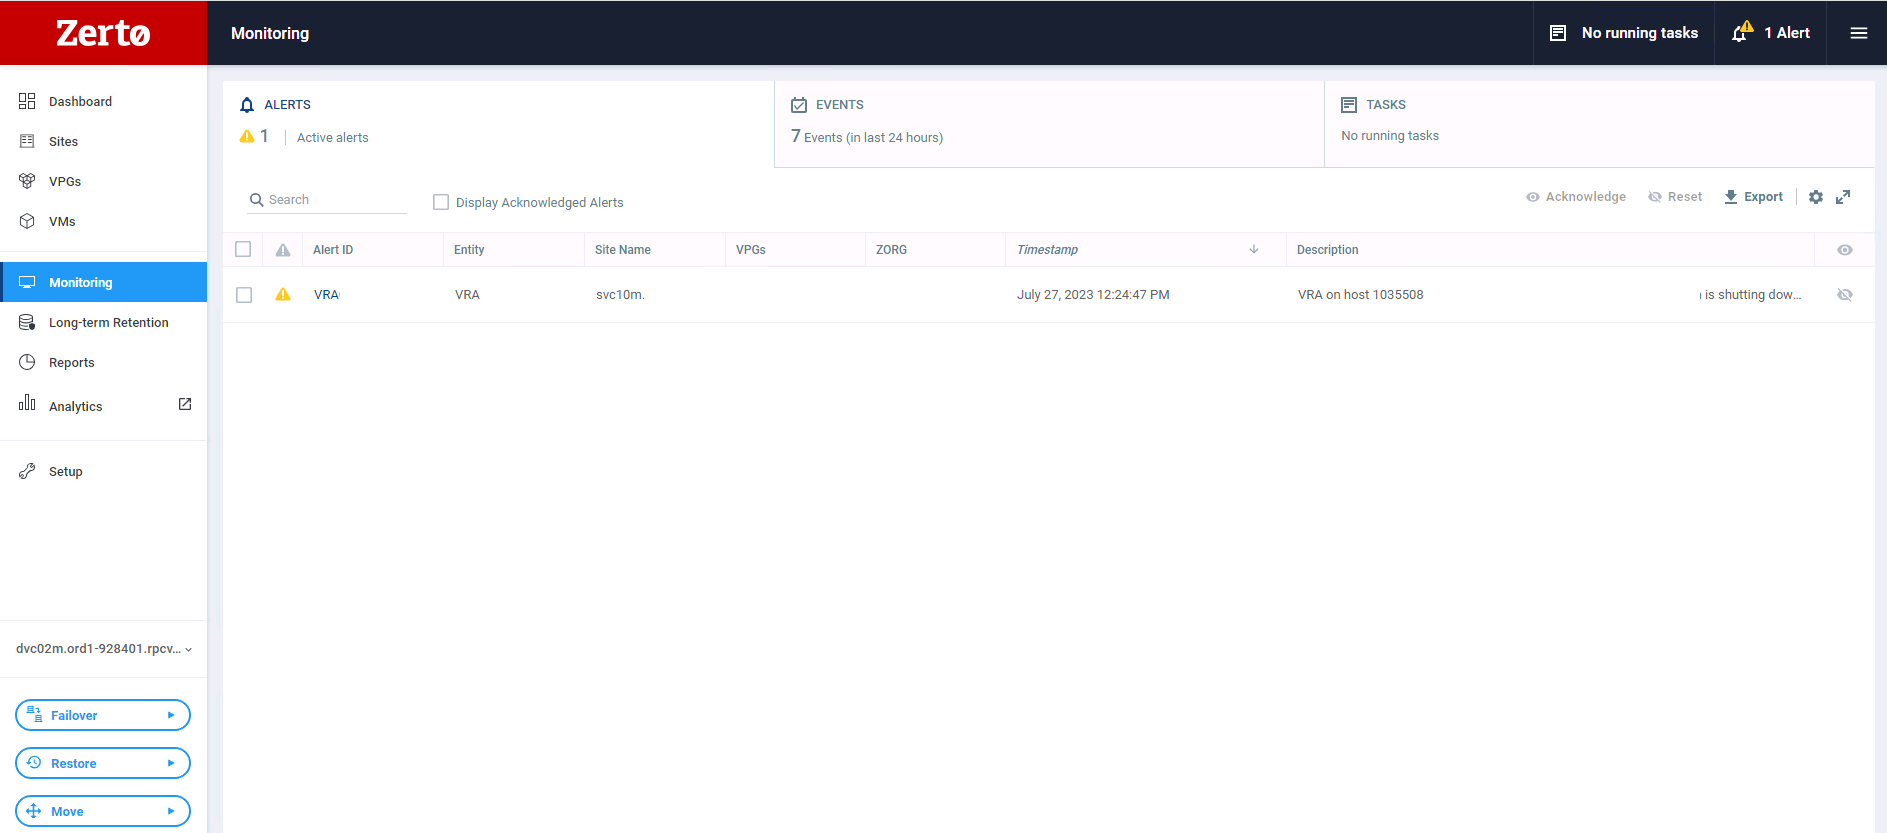
or from the main ZVM dashboard.
VMs that cannot be Replicated
The following VMs cannot be replicated with Zerto:
- VMs with IDE virtual disks
- VMs with DVDs connected.
- VMs with no vdisks.
- VMs with RDMs attached to BusLogic controllers.
Updated 5 months ago