How to import PST files to Microsoft 365
How to import PST files to Microsoft 365
This article describes how to import a PST file into a Microsoft 365 mailbox.
Prerequisites
- Applies to: Cloud Office Administrator
- Difficulty: Moderate
- Tools required: Microsoft Outlook
NOTE: Importing PST files into a mailbox requires the desktop version of Microsoft Outlook on Windows. If you have not yet configured your Microsoft 365 mailbox in Microsoft Outlook, see Set up your Microsoft 365 Exchange Online mailbox in Outlook for Windows for configuration steps.
For more information about prerequisite terminology, see Cloud Office support terminology.
Importing PST files to Microsoft 365
Step 1. Open Microsoft Outlook with your Microsoft 365 mailbox profile.
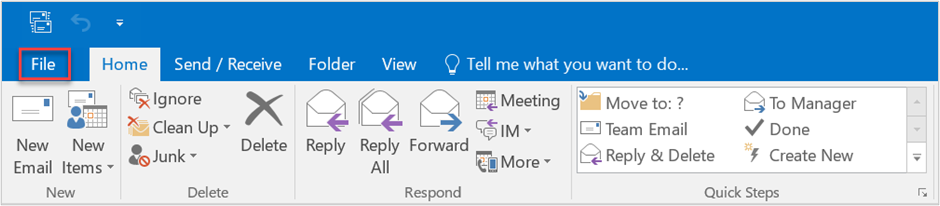
Step 2. At the top of the Outlook ribbon, select File.
Step 3. Select Open & Export >> Import/Export. This will open the Import/Export wizard.

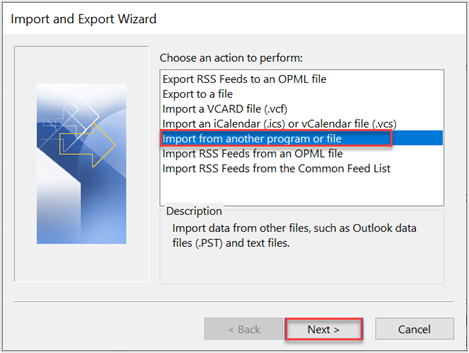
Step 4. Select Import from another program or file, and then click Next.
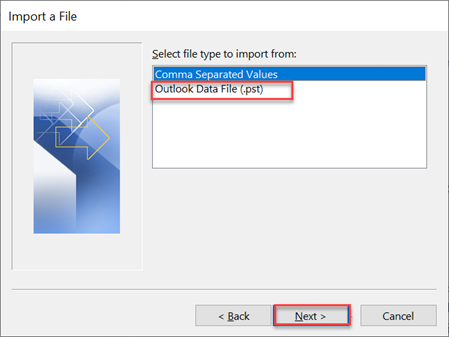
Step 5. Select Outlook Data File (.pst) and click Next.
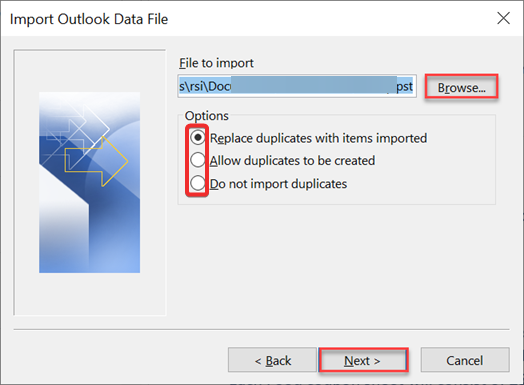
Step 6. Click Browse to search for the .pst file you want to import. Under Options, choose how you want to handle duplicate items, then click Next.
Step 7. Make sure the checkbox for include subfolders is checked and the Import items into the same folder in: is selected, with your mailbox selected in the drop-down menu.
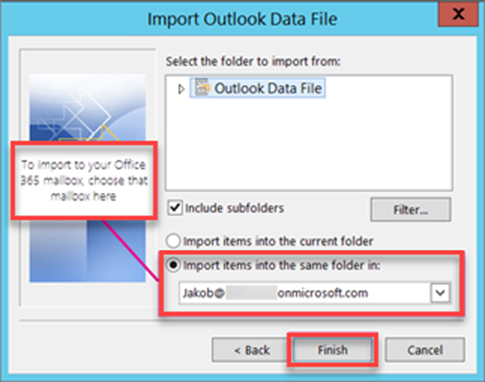
Step 8. Click Finish. Outlook will begin importing the contents of your PST file. This process can take anywhere from a few seconds to a few hours depending on the size of the PST file.
How to import a .pst file into a Microsoft 365 mailbox using Microsoft Outlook
{{< youtube w-DTWtGHspQ >}}
Updated 5 months ago