VCDA Disaster Recovery
Introduction
SDDC Business and Enterprise customers can optionally add Disaster Recovery (DR) services to their SDDC deployment. DR Services are offered in two tiers - an initial tier which provides customers with the essential features they need to replicate and failover their VM workloads between vCenters, and a premium tier which offers additional features including the use of consistency groups and continuous data protection.
VMware Cloud Directory Availability (VCDA) is the product used to provide the initial tier of DR services and offers the following features:
- Interval based replication of individual VMs between vCenters
- VM failover and test failover options
- Migration of protected virtual machines between vCenters
- Self-service protection and failover workflows per VM
- Customization of VM networking and storage options
- Granular RPO selection from 1 minute to 24 hours
- Built-in end-to-end TLS encryption of replication traffic with optional compression
This wiki will provide details on how to configure and manage VM replications in SDDC-Enterprise and SDDC-Business.
Applicable To
This document is applicable to SDDC-Enterprise and SDDC-Business deployments.
Protection vs Migration
VCDA offers 2 types of VM replication operation: protection and migration.
Protection should be used where replication of a VM is required for DR purposes. This allows you to specify the desired RPO (1 minute to 24 hours).
Migration operations are used to move VM workload from site to site. This has a single RPO (24 hours).
Accessing the User Interface
The VCDA user interface is accessible in 3 ways:
- Directly accessing the VCDA appliance UI from a browser
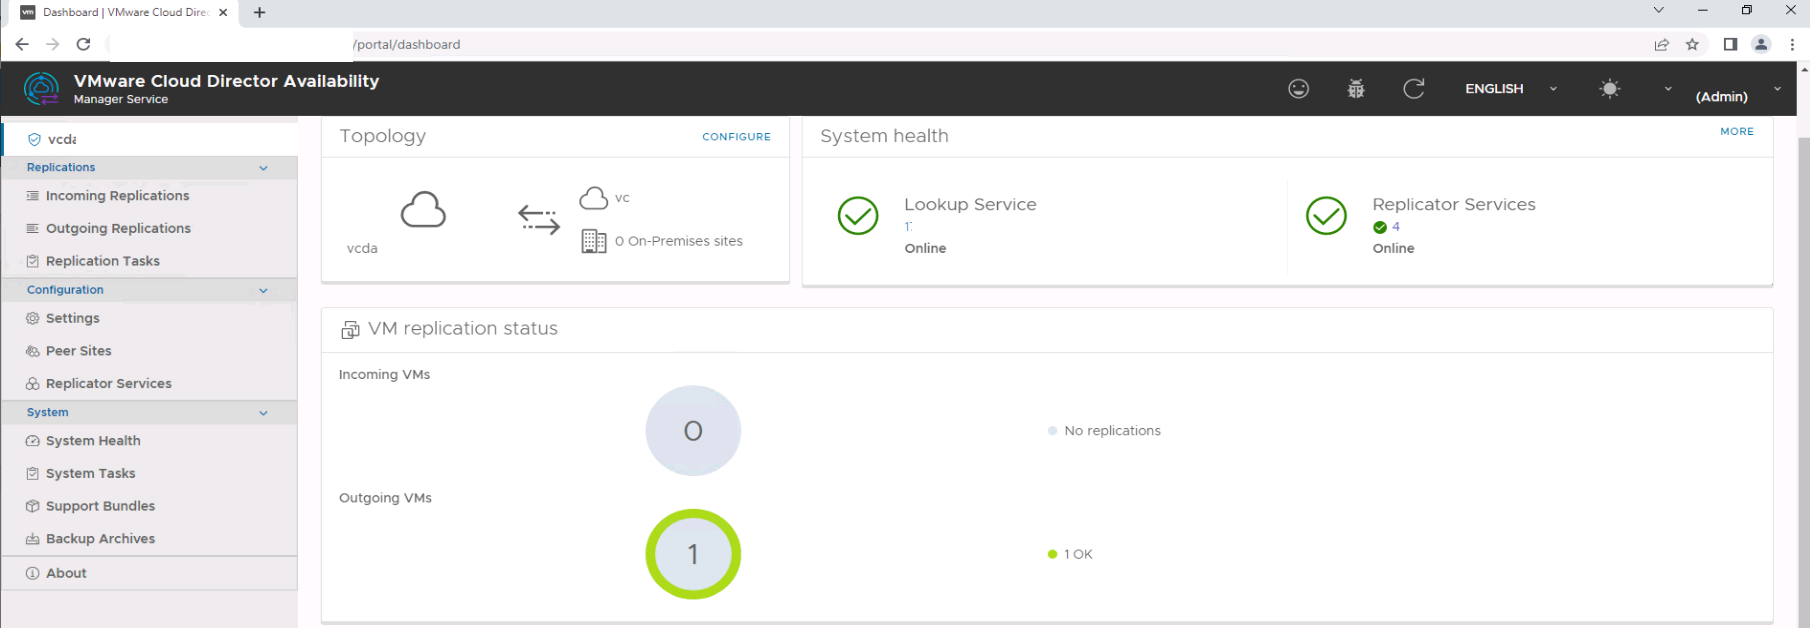
- Opening the UI via the vCenter "Cloud Provider DR and Migration" plugin
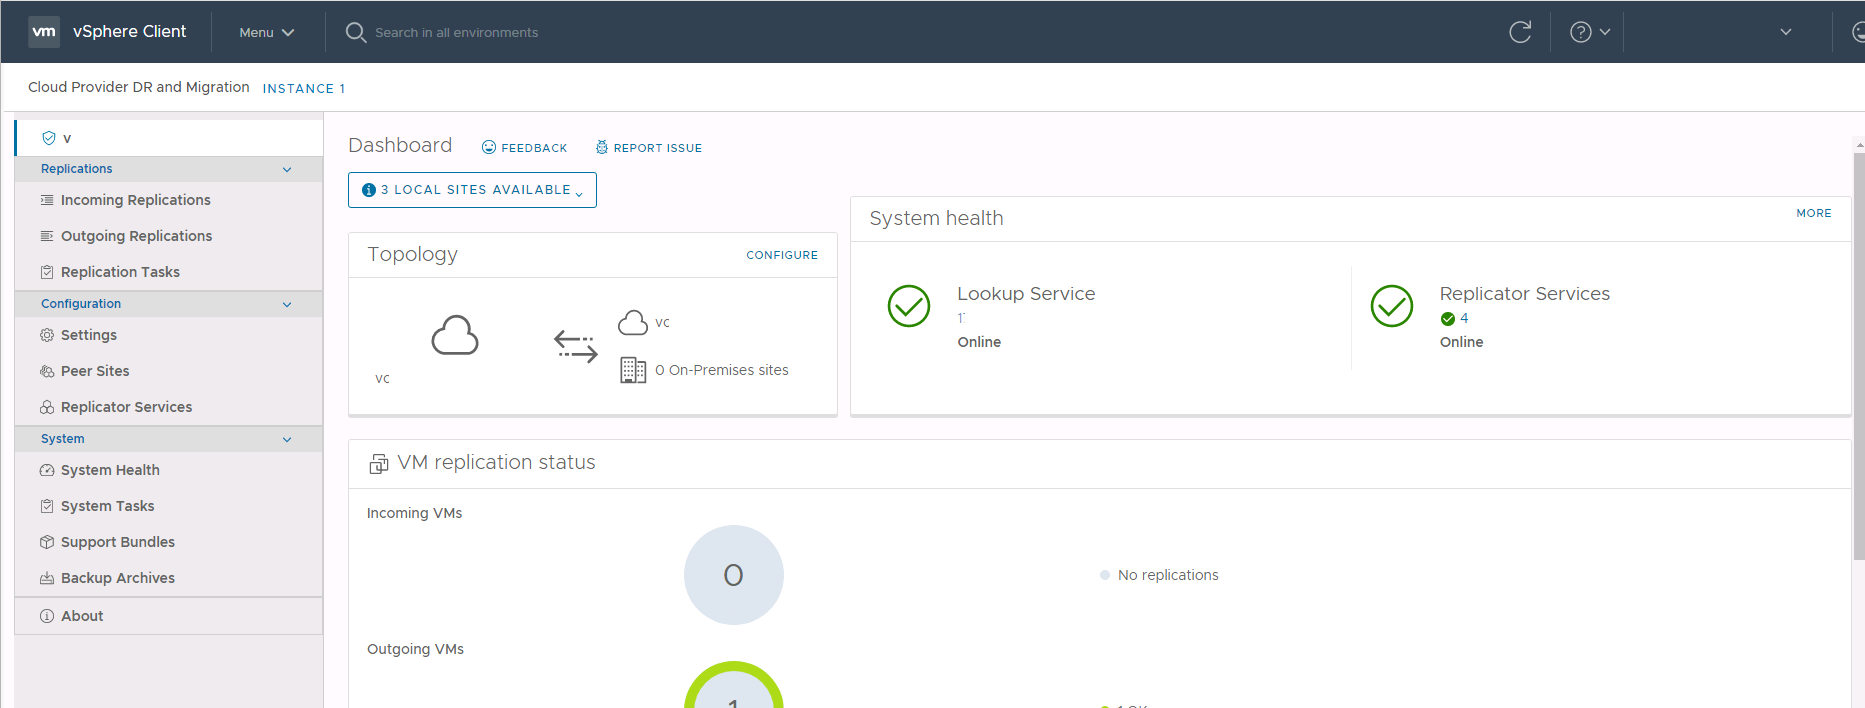
- Using the contextual menus from within the vCenter inventory
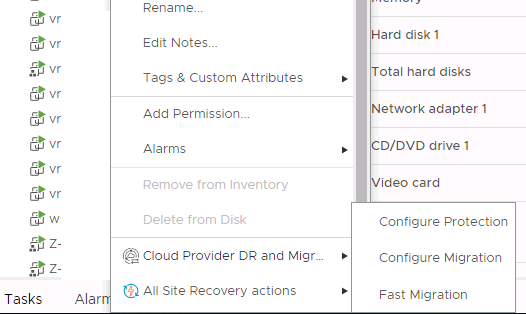
This guide will primarily focus on performing actions in VCDA via the vCenter plugin.
Setting Up VM Replication
Configuring VM Replication via the VCDA Plugin
- Open a browser and navigate to the SDDC-Enterprise or SDDC-Business vCenter UI.
- Login to the vCenter as a user which has been added to the customer_access permissions group.
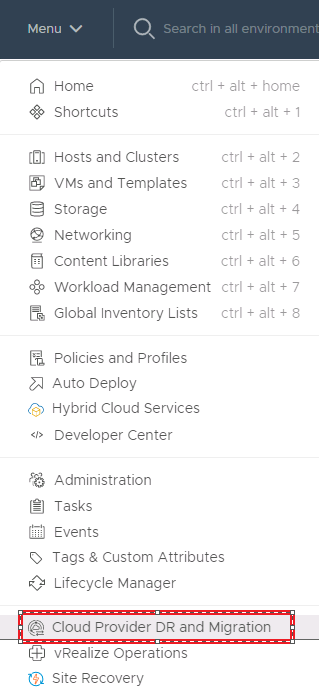
- Click Menu and Cloud Provider DR and Migration to open the VCDA vCenter plugin.

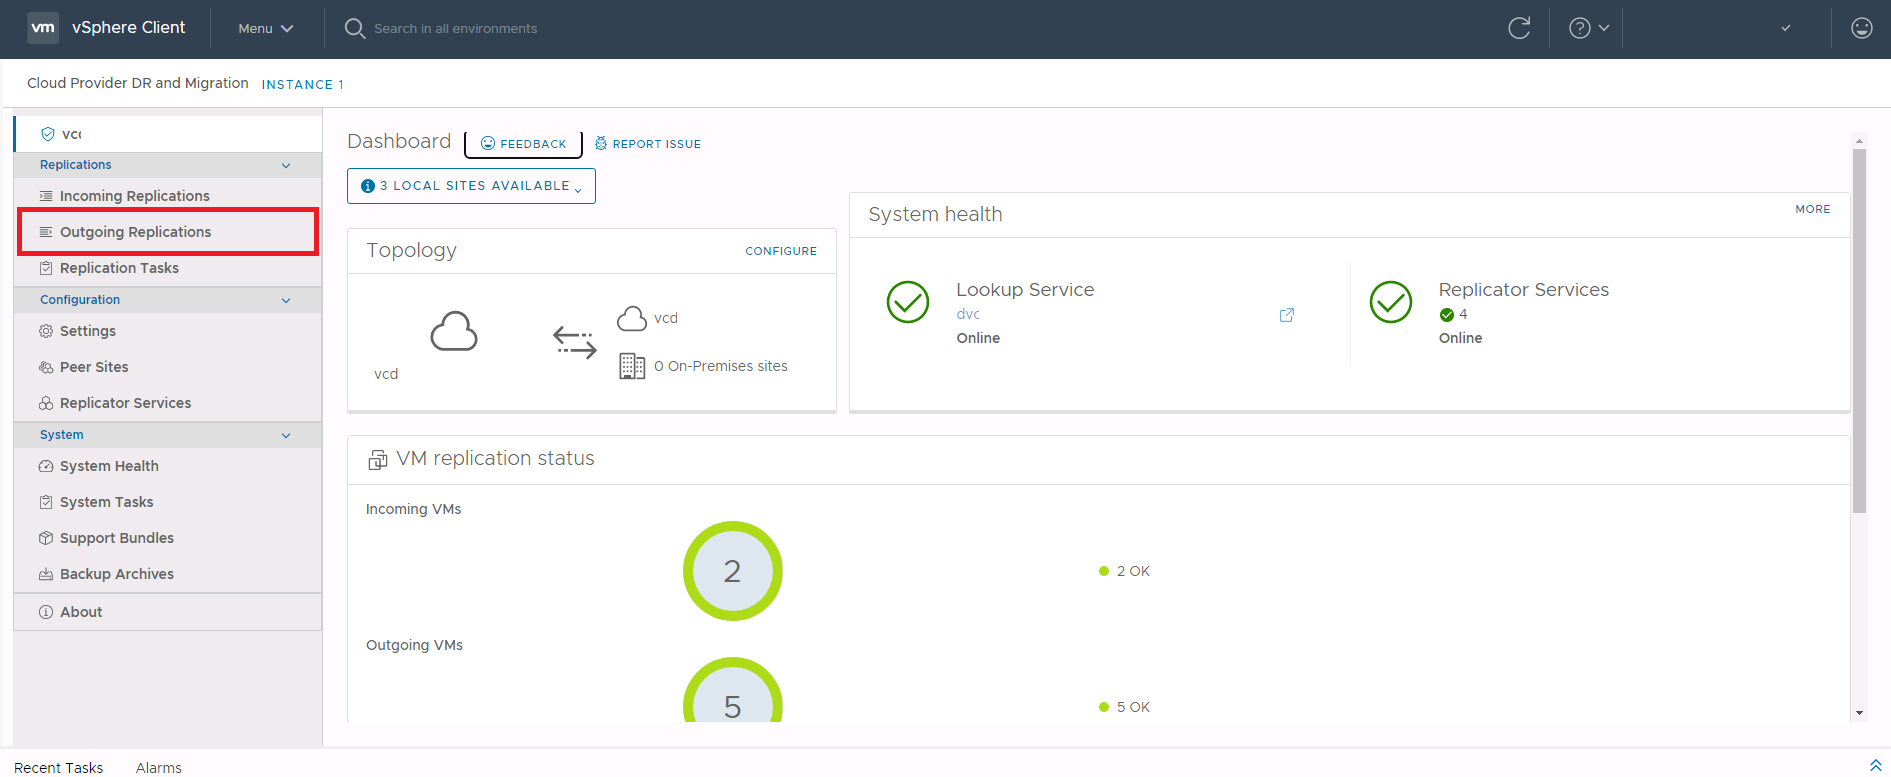
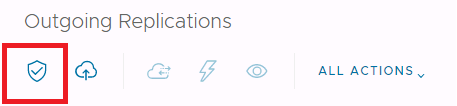
- Using the menu on the left-hand side, click Outgoing Replications.
- From the Outgoing Replications UI, click the shield symbol to create a new VM protection replication. This will open the New Outgoing Replication window.
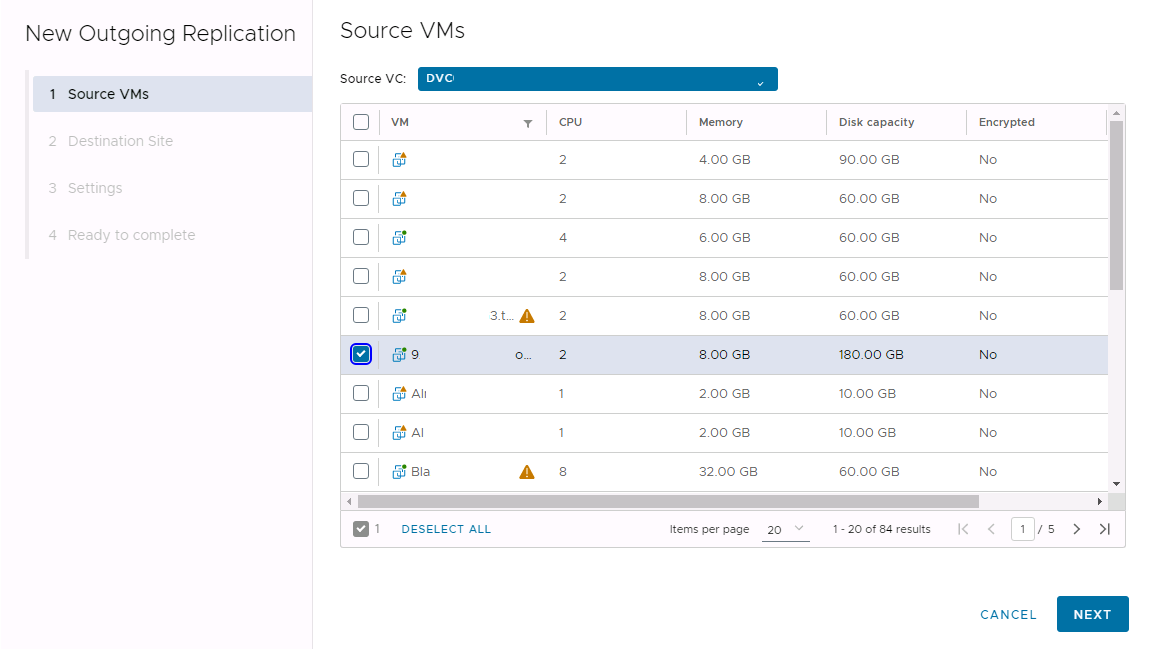
- On the Source VMs page, check the checkmark next to the VM(s) you wish to replicate and click NEXT.
- Multiple VMs can be selected here. This will cause the same configuration settings defined on the proceeding pages to be applied to them.
A yellow triangle with an exclamation mark is shown against the VM signifies that the VM is already being replicated with VCDA.
- Multiple VMs can be selected here. This will cause the same configuration settings defined on the proceeding pages to be applied to them.
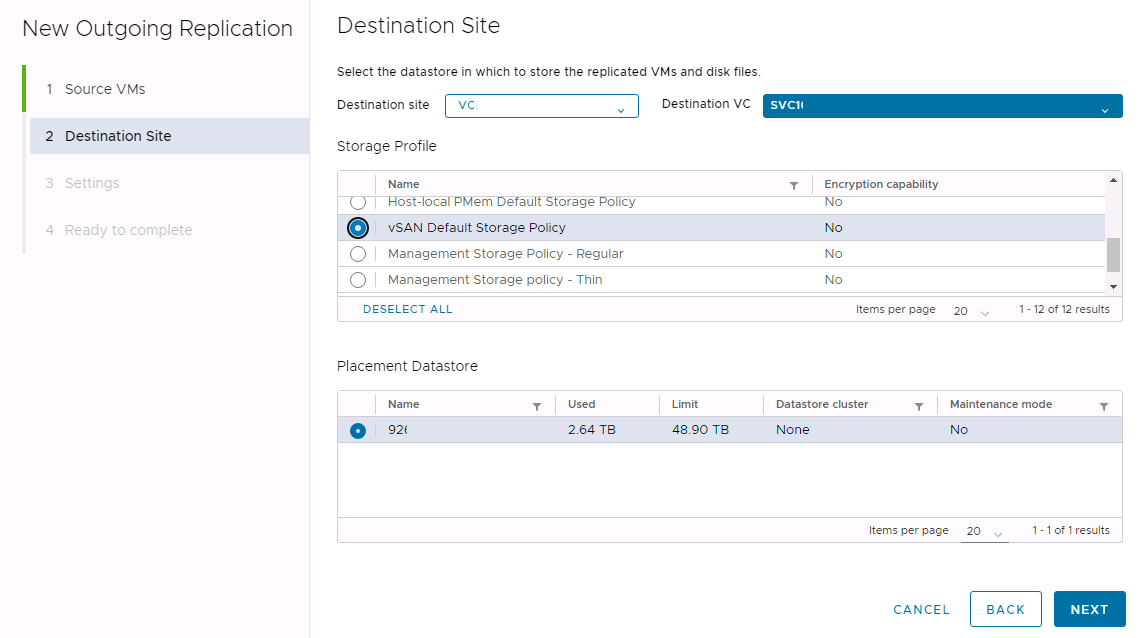
- From the Destination Site page:
- Select the destination VCDA site and vCenter (applicable if the local site is peered to more than one destination VCDA site).
- In the Placement Datastore section, select the datastore to use at the destination site as target for VM replication.
- A Storage Profile can be selected to filter the list of datastores.
- The click NEXT.
- On the Settings page, multiple configuration details can be set for the replications. When configured, click NEXT to continue.
- Target recovery point objective (RPO) - Use the slider to set the RPO you want VCDA to honor when replicating data to the remote site. This can be set from between 1 minute to 24 hours.
- Please note: setting a low RPO will increase the frequency at which data is read from the source site datastore, replicated, and written to the destination site datastore, and thus increases the storage workload on the datastores. The storage must be able to adequately service the read and write workload from VCDA in order to keep the VM replications within the specified RPO. This is also applicable to the network bandwidth between sites. If the VM data cannot be read, transferred and written to the destination site within the interval between replication operations (which will occur at or before the RPO expires), the VM replication will go into an RPO violation error state.
- Retention policy for point in time instances
- Here you can configure rules to retention point in time instances (think snapshots) of the replicated VM(s) at the remote site. These are known within VCDA as Rotated Instances. Up to 24 can be retained.
- To use this feature, first click the slide button to Enable retention policy.
- Once enabled, you can configure 1 or more retention rules.
- Define:
- Instances - this is the number of points in time instances to retain over the configured time period.
- Distance - this is the desired time interval between point in time instances being retained.
- Unit - this can be set to minutes, hours, days, weeks, months, or years.
- For example - setting instances to 4, distance to 1 and unit to hours will instruct VCDA to retain 4 PiT instances, one hour apart. Resulting in 4 hours worth of data retention. Once the 4 hours expires, the oldest instance will be deleted and a refresh PiT instance retained, ensuring 4 hours of retention is maintained.
- Multiple retention rules can be configured with various retention intervals. For example, you can configure one rule to retain 4 instances, 15 minutes apart (total rention period is 60 minutes), and another rule to retain 12 instances, 1 hour part (total retention time 12 hours).
- NOTE: the total number of instances you configure to be retained across all your rention rules cannot exceed 24.
- NOTE: When setting retention rules, ensure that the RPO configured for the VM(s) is lower than the smallest distance configured in the rules. Failing to do this will mean that you're asking VCDA to, for example, retain instances every hour (retention rules), but only replicating the data in the first place every 12 hours (RPO).
- Define:
- Activate quiesce - VCDA will attempt to use VMware Tools to quiesce the VM's filesystems to take a consistent image of the VM prior to replicating.
- Compress replication traffic - Enabling compression will reduce network traffic between the sites, however, will potentially cause an increase to CPU utilization on the VCDA replication appliances.
- NOTE: Compression may have variable result depending on how well the data being replicated compresses - for example, it may not be sensible to enable it on VM's hosting databases which will not compress well.
- Disk Provisioning - What provisioning type should be used at the remote site for the VMDKs.
- Delay start synchronization - If enabled you will be given the option to set a date and time when to start the initial synchronization of the VM replication.
- Exclude disks - If enabled, an additional page of the New Outgoing Replication wizard becomes available where you can select which vdisks to include or exclude from replication for each VM
- Target recovery point objective (RPO) - Use the slider to set the RPO you want VCDA to honor when replicating data to the remote site. This can be set from between 1 minute to 24 hours.
- On the Ready to complete page, review your configuration and, when ready, click FINISH. VCDA will then configure the replication and perform an initial sync (unless an initial sync delay was added).
- The status of the replication initial sync can be monitored via the VCDA UI.
- Once the initial sync has completed, the replication will go into a Healthy state.
Configuring Recovery Settings
Following the configuration of a new VM replication, recovery settings can be set which will be applied to the VM during failover to the destination site.
Recovery settings can also be applied at the time the failover is performed. As a result, pre-staging the recovery settings is optional, but recommended.
- Open a browser and navigate to the SDDC-Enterprise or SDDC-Business vCenter UI.
- Login to the vCenter as a user which has been added to the customer_access permissions group.
- Click Menu and Cloud Provider DR and Migration to open the VCDA vCenter plugin.
- Select either Outgoing Replications or Incoming Replications from the menu on the left-hand side.
- Check the checkbox next to the VM(s) name that you want to configure recovery settings for.
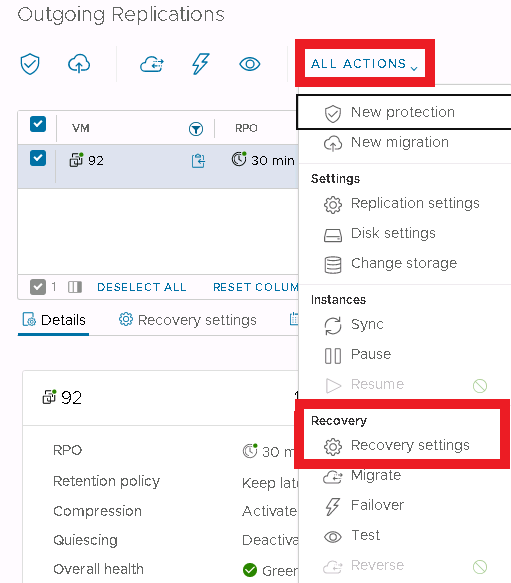
- Click ALL ACTIONS and then Recovery settings.
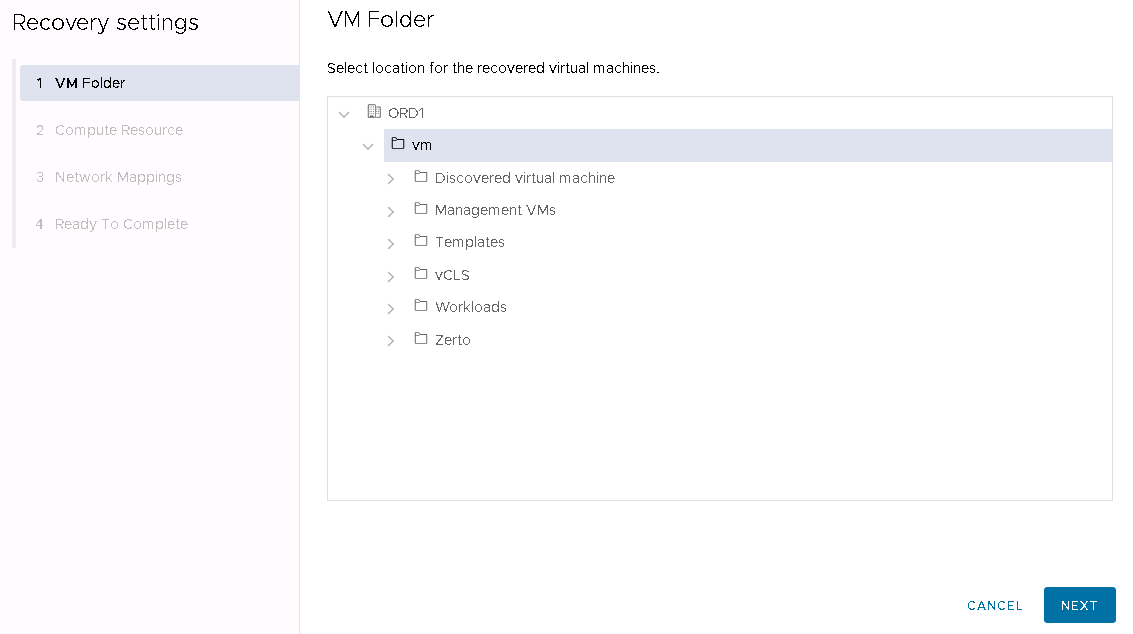
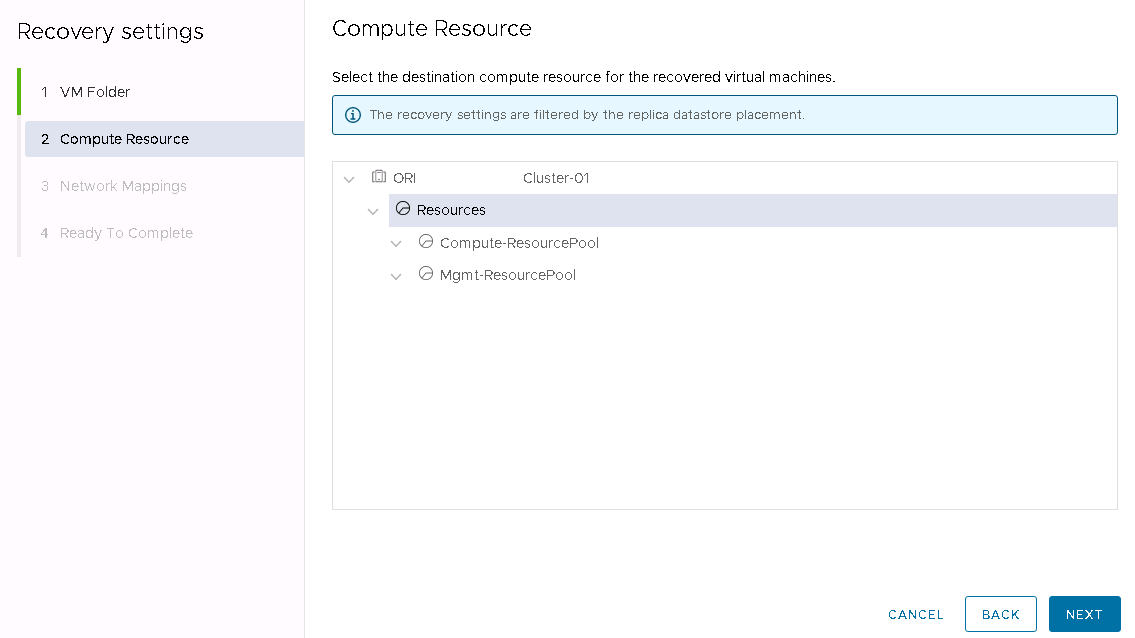
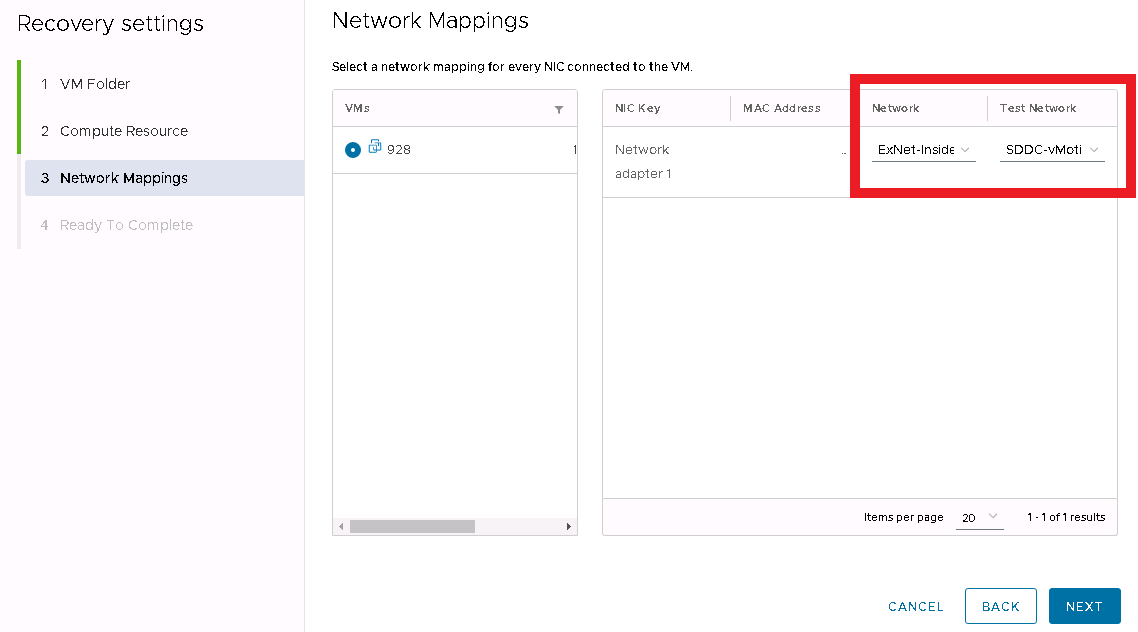
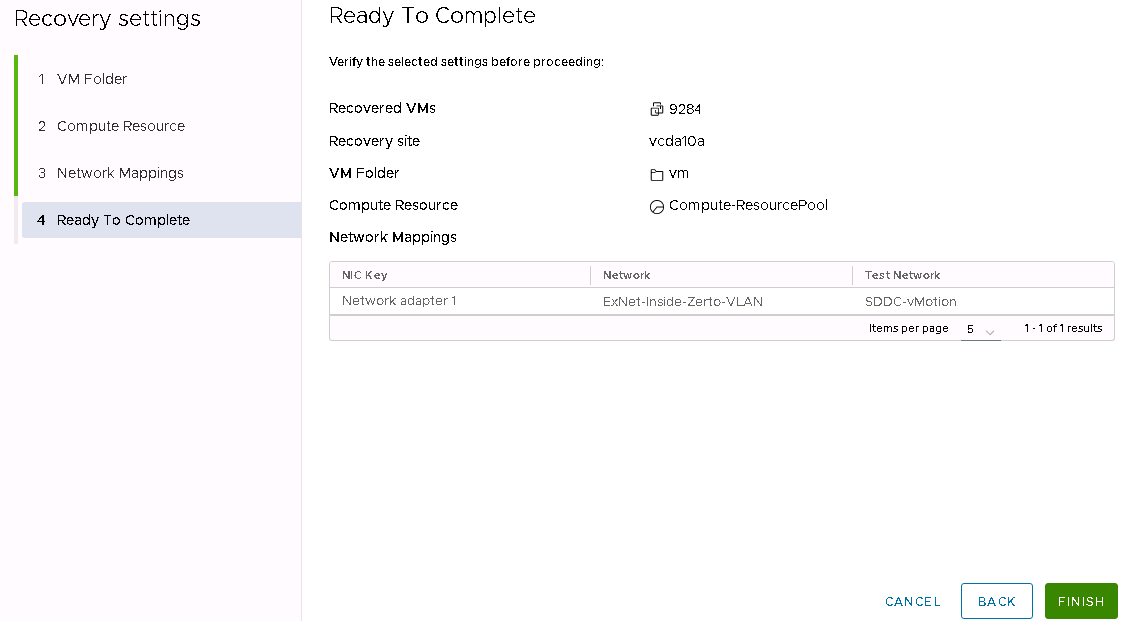
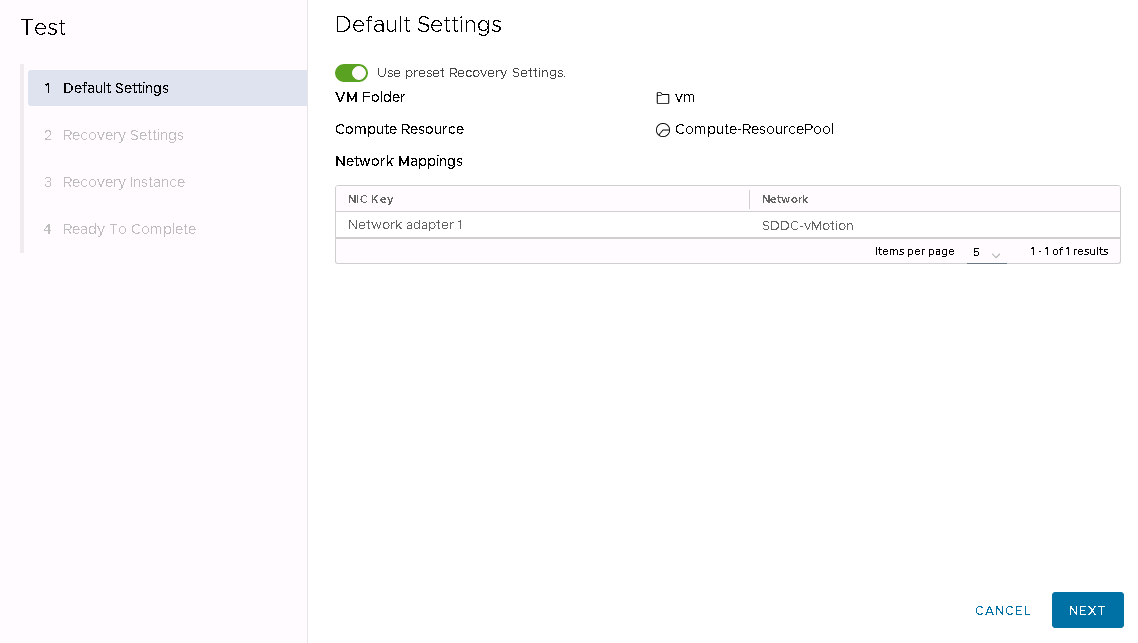
- In the Recovery settings wizard, set the following:
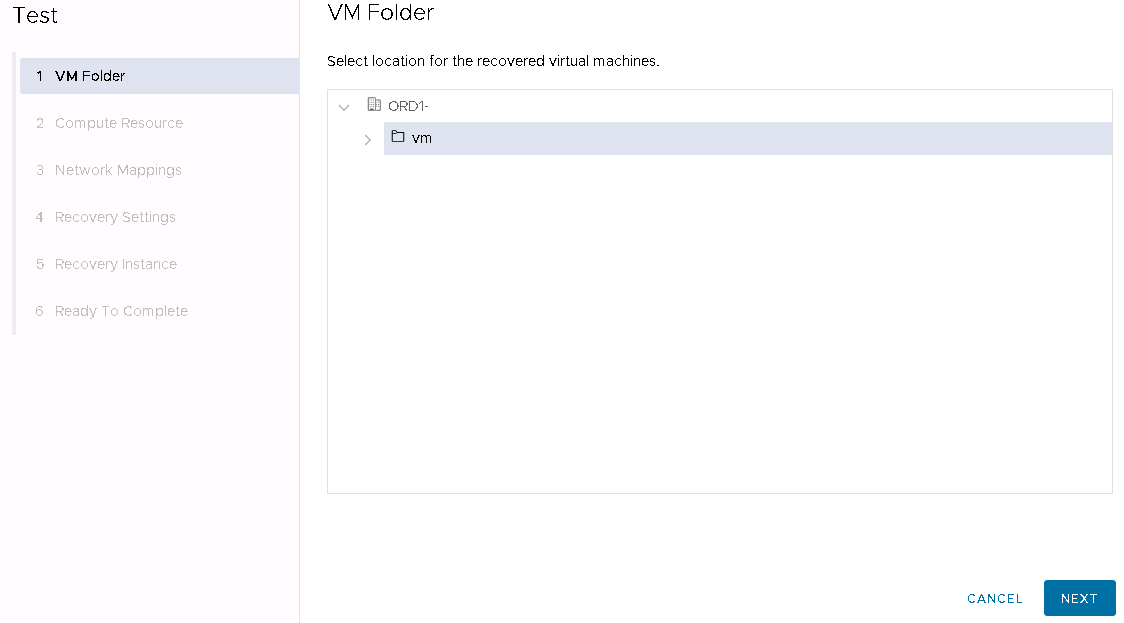
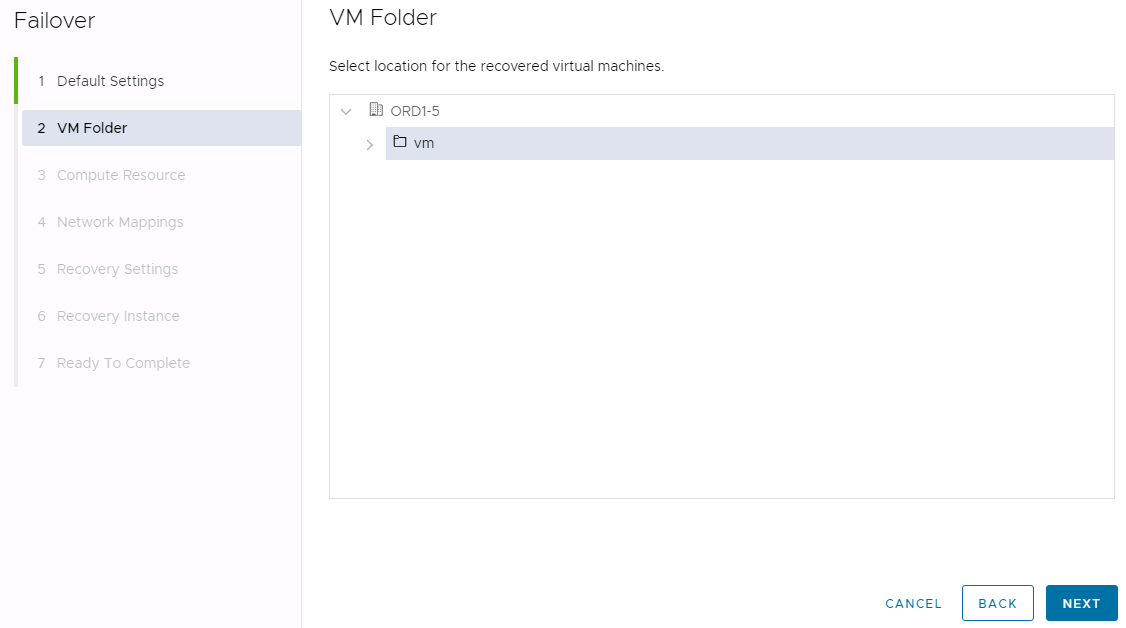
- VM Folder - select the VM folder location on the destination vCenter where you want to store the replicated VMs after failover.
ii. Compute Resource - select the resource pool you wish to use to host the replicated VMs after failover.
iii. Network Mappings - For each VM being configured, select a network port group to be used on the destination vCenter for a full VM failover, and a test VM failover.
- When the recovery settings have been configured, review the configuration and click FINISH.
Checking the status of VM Replications
- Open a browser and navigate to the SDDC-Enterprise or SDDC-Business vCenter UI.
- Login to the vCenter as a user which has been added to the customer_access permissions group.
- Click Menu and Cloud Provider DR and Migration to open the VCDA vCenter plugin.
- Select either Outgoing Replications or Incoming Replications from the menu on the left hand side.
- The UI will then show an overview of the VMs being replicated out of the local site (outgoing replications) or being replicated into the local site (incoming replications). This includes summary information about their configured RPO, source and destination sites, and replication status.
- Outgoing Replications: The UI will display only the replications going to a single site at one time. Use the Destination site drop down menu on the right hand side to select which destination site you wish to view the outgoing replications for.

ii. Incoming Replications: By default, all incoming replications will be displayed. This can be filtered per source site using the Source site drop down menu on the right-hand side.

- Information in the summary display can be switched between showing status information and showing information about the instances using the Show details buttons.

i. The instances option will display summary information about the latest instance including, date/time the instance was captured, retention policy, and consumed storage capacity.
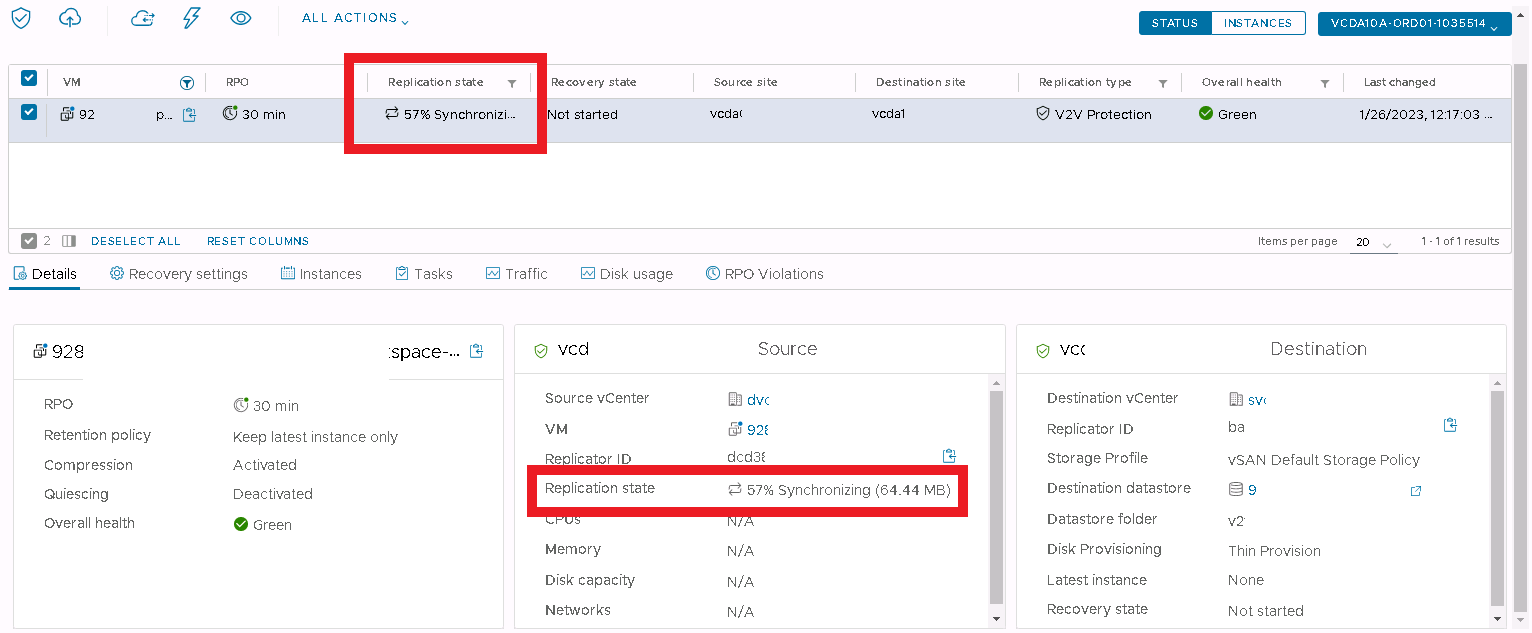
- Check the checkbox next to the VM name that you want to view details for. This will reveal a number of tabs available underneath. The first tab (Details) will be displayed by default.
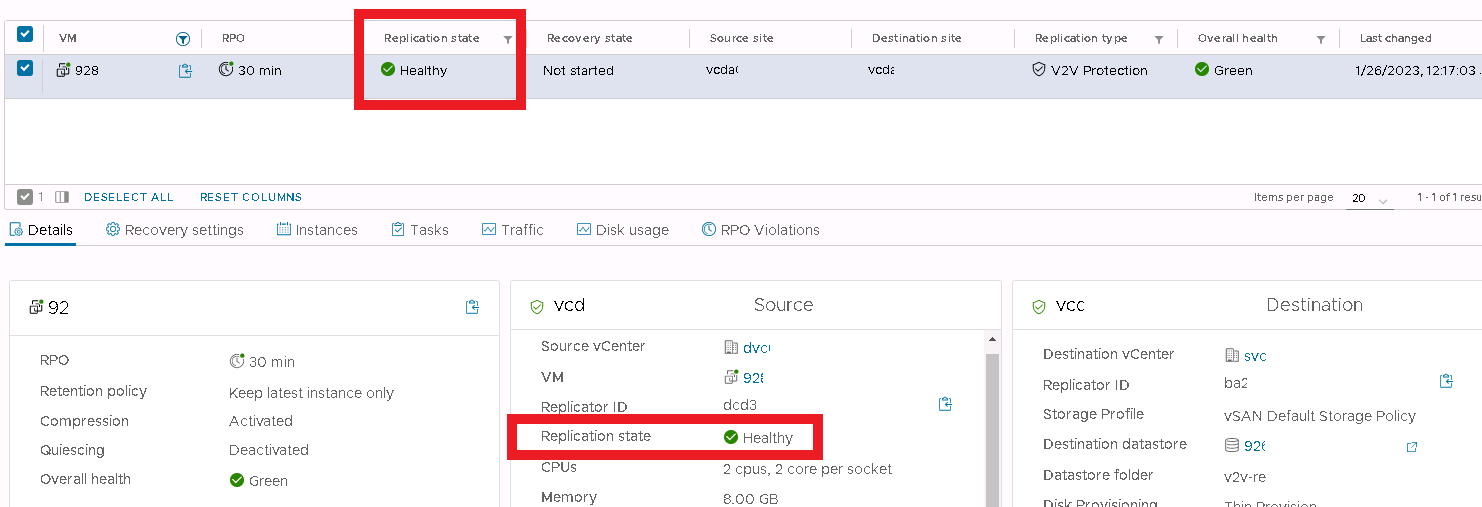
- Details will display 3 information panes with more detailed information about the VM being replicated
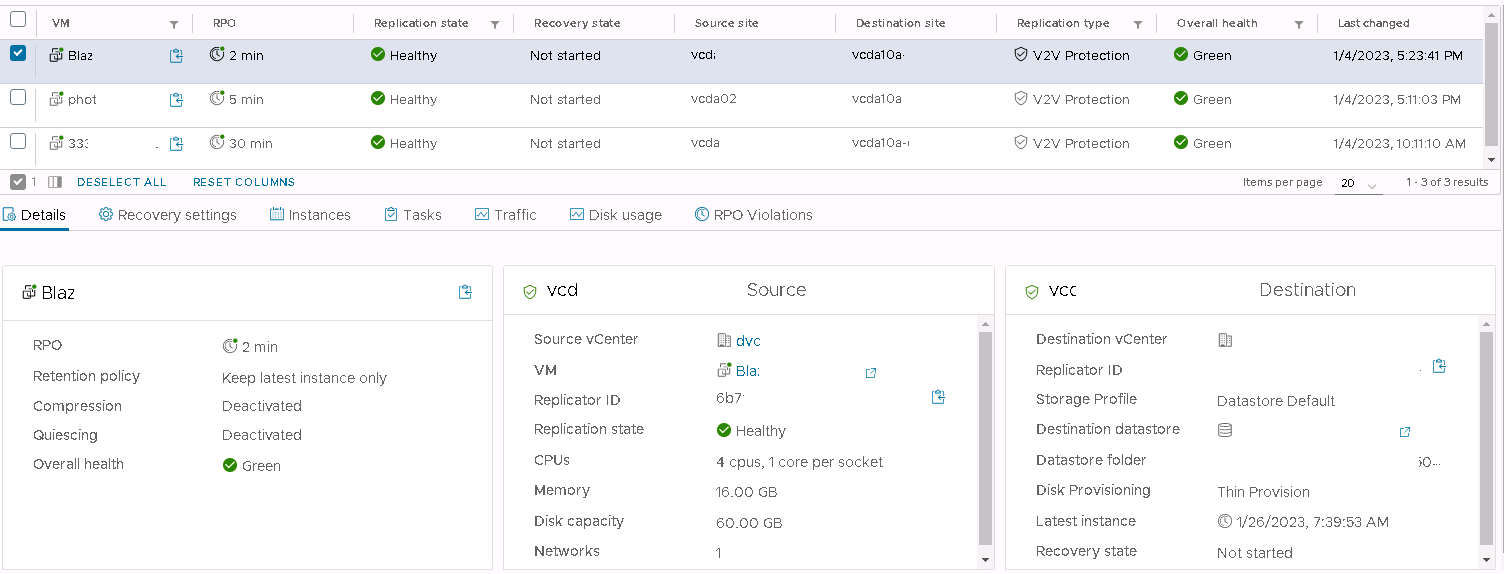
a. The information pane on the left provides information about the configuration of the replication - i.e., it's RPO, retention policy, compression and quiescing status, as well as the replications overall health.
b. The middle pane provides information about the source VM, including its name and vCenter, the ID of the replicator appliance which is currently assigned this replication, and details of the VM hardware configuration.
c. The information pane on the right provides information about the destination site, including the destination vCenter name, the ID of the remote site replicator appliance processing the replication traffic, storage configuration information, and a date/time of when the last instance of the source VM was replicated to the destination site.
ii. The Recovery settings tab is currently unused.
iii. The Instances tab provides a view of the point in time instances (similar to snapshots) which exist at the destination site for this VM. If no retention rules have been configured only 1 instance will be visible - known as the latest instance. There will always be at least the latest instance shown here.

a. For each instance listed some summary information will be displayed, including the size of the changed data which was sent to the destination site to when this instance was created, and how long it took to transfer the data.
If the transfer time is longer than the RPO interval, the VM will alert with an RPO violation.
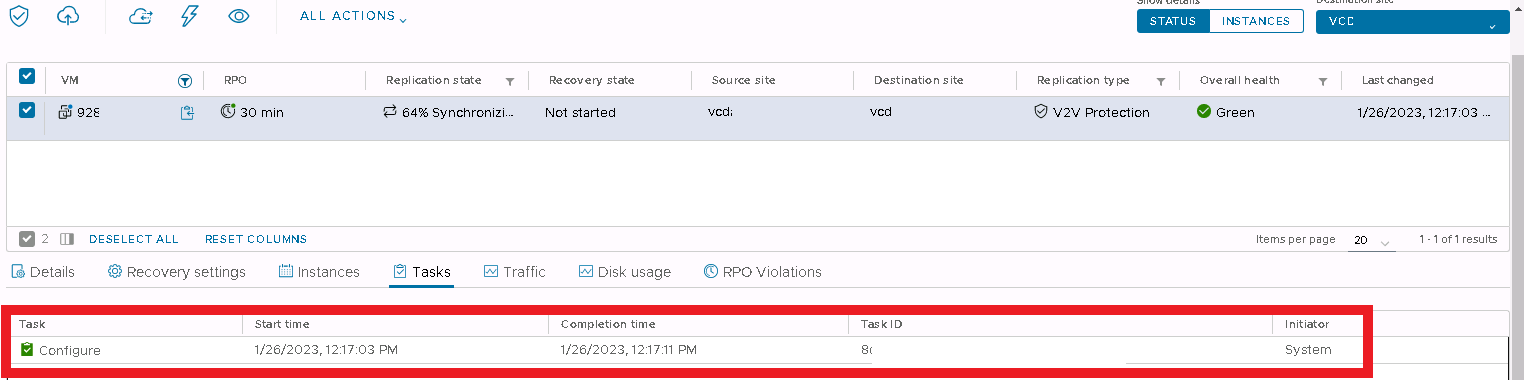
iv. The Tasks tab provides a list of recent tasks which have been executed on this VM replication.
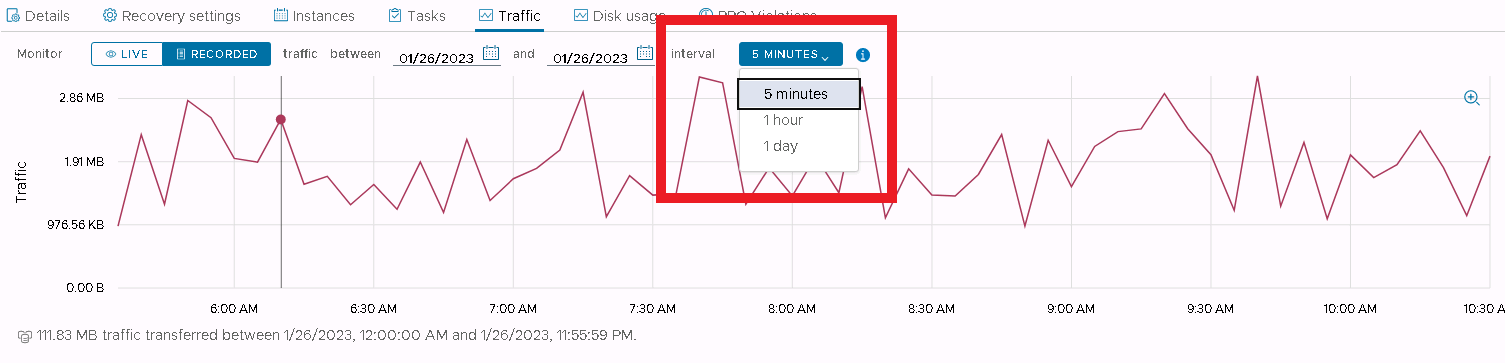
v. The Traffic tab provides real time and historical graphs of data transfer traffic. Use the LIVE and RECORDED buttons to move between the views. The traffic data can be viewed at different intervals of granularity, however the lower the interval the less historical data will be retained:
a. 5 minute interval data is available for the last 5 hours.
b. Hourly interval data is available for the last 14 days.
c. Daily interval data is available for the last 60 days.
vi. The Disk Usage tab displays historical information about disk usage of the replicated VM at the destination site. Similarly, to as found in the Traffic tab, this historical data can be viewed at multiple intervals which effects the length of time that data is retained.
vii. The final tab shows any RPO Violations that have occurred for this replication.

Failovers
Perform a Failover Test
- Open a browser and navigate to the SDDC-Enterprise or SDDC-Business vCenter UI.
- Login to the vCenter as a user which has been added to the customer_access permissions group.
- Click Menu and Cloud Provider DR and Migration to open the VCDA vCenter plugin.
- Once the VCDA UI has opened, go to the VM you wish to test failover on (via the Outgoing Replications or Incoming Replications menu options) and check its checkbox to select it.
- Multiple VMs can be selected at one time.
- Then click ALL ACTIONS and Test.

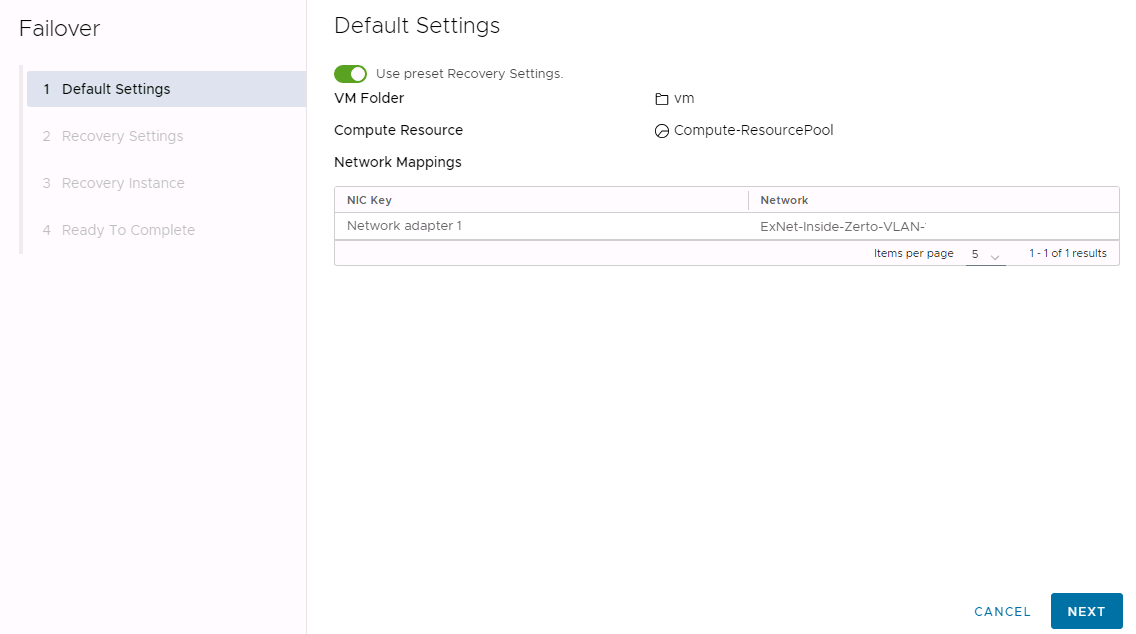
- If recovery settings have been preconfigured on the VM you can choose to accept the defaults, or override them. If no settings have been preconfigured, you must specify them here. When ready, click NEXT.
- Preconfigured recovery settings.
- Use the Use present Recovery Settings switch to override the preset recovery settings.
- Preconfigured recovery settings.
ii. No preconfigured recovery settings.
a. Follow the steps located in the Configuring Recovery Settings section of this wiki to set the recovery settings.
- On the Recovery Settings page, select whether to:
- Instances handling after recovery - if a VM has been configured to use retention rules and there are multiple instances stored at the destination site, choose whether to.
- Default - Recommended. The VM will be brought online at the destination site using a "delta" vdisk. The original replication destination vdisks will continue receiving updates from the source site during the test.
- Expose PITs - like the default option, except that if the VM has been configured to use retention rules and there are multiple instances stored at the destination site, these will be exposed to the test-failed over VM as snapshots. This allows you to revert the test VM back to an ealier point-in-time.
- Power settings - choose whether to power on the VM after failover or not.
- Then click NEXT.
- Instances handling after recovery - if a VM has been configured to use retention rules and there are multiple instances stored at the destination site, choose whether to.
- On the Recovery Instance page, select whether to:
- Synchronize the VM to its current state (i.e., take an up-to-date instance) prior to failing over the VM.
- or alternatively select a previously captured instance to use when failover over the VM.
- Use the graphic to select the instance you wish to use.
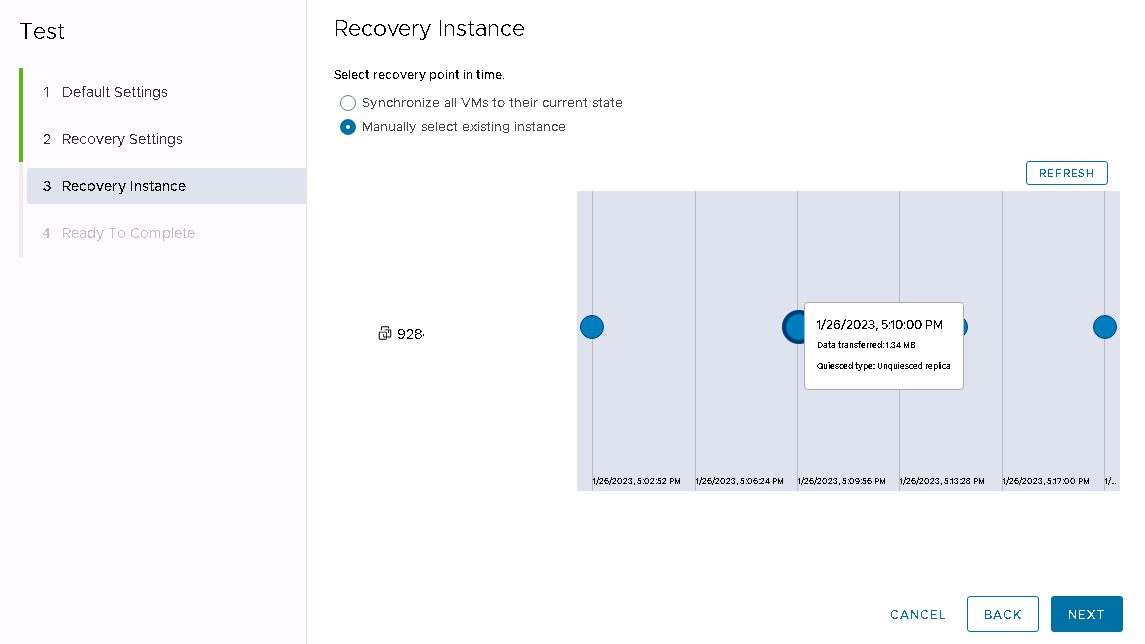
Then click NEXT.
- On the Ready To Complete page, review the configuration and click FINISH.

- VCDA will then bring up the test VM at the destination site. When it is ready the reported Recovery State of the replication will change to Test image ready.

- When testing is completed, cleanup the test VM by selecting the VM in the VCDA UI, going to ALL ACTIONS and selecting Test Cleanup.
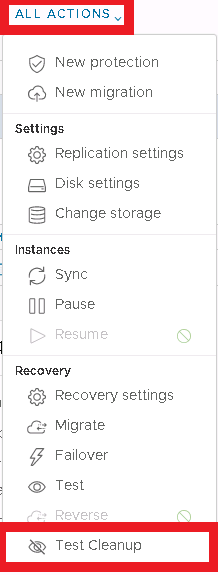
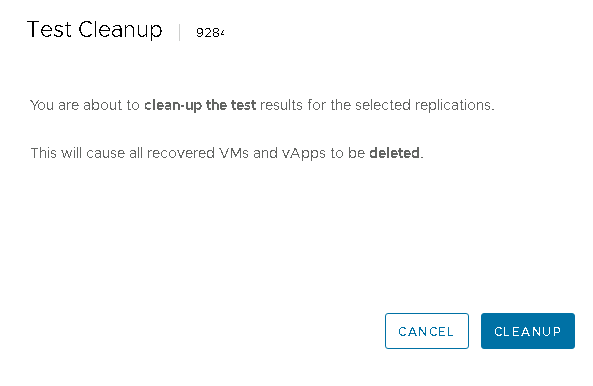
- You will then be prompted that the test VM will be powered off and deleted at the destination site. Click CLEANUP to continue.
Performing a Failover
- Open a browser and navigate to the SDDC-Enterprise or SDDC-Business vCenter UI.
- Login to the vCenter as a user which has been added to the customer_access permissions group.
- Click Menu and Cloud Provider DR and Migration to open the VCDA vCenter plugin.
- Once the VCDA UI has opened, go to the VM you wish to test failover on (via the Outgoing Replications or Incoming Replications menu options) and check its checkbox to select it.
- Multiple VMs can be selected at one time.
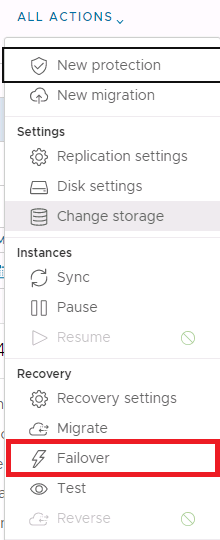
- Then click ALL ACTIONS and Failover.
- If recovery settings have been preconfigured on the VM you can choose to accept the defaults or override them. If no settings have been preconfigured, you must specify them here. When ready, click NEXT.
- Preconfigured recovery settings.
- Use the Use present Recovery Settings switch to override the preset recovery settings.
- Preconfigured recovery settings.
ii. No preconfigured recovery settings.
a. Follow the steps located in the Configuring Recovery Settings section of this wiki to set the recovery settings.
- On the Recovery Settings page, select whether to:
- Instances handling after recovery - if a VM has been configured to use retention rules and there are multiple instances stored at the destination site, choose whether to.
- Default - The VM will be brought online at the destination site using the point-in-time instance selected. However, disk consolidation will be required to maximize performance and clean up any additional point-in-time instances remaining.
- Expose PITs - like the default option, except that if the VM has been configured to use retention rules and there are multiple instances stored at the destination site, these will be exposed to the failed over VM as snapshots. This allows you to revert the VM back to an earlier point-in-time.
- Consolidate - Recommended. This will consolidate all point-in-time instances found at the destination site for this VM before powering on the VM. This could cause the time to recovery to be extended but result in the optimal configuration of the failed over VM.
- Power settings - choose whether to power on the VM after failover or not.
- Instances handling after recovery - if a VM has been configured to use retention rules and there are multiple instances stored at the destination site, choose whether to.
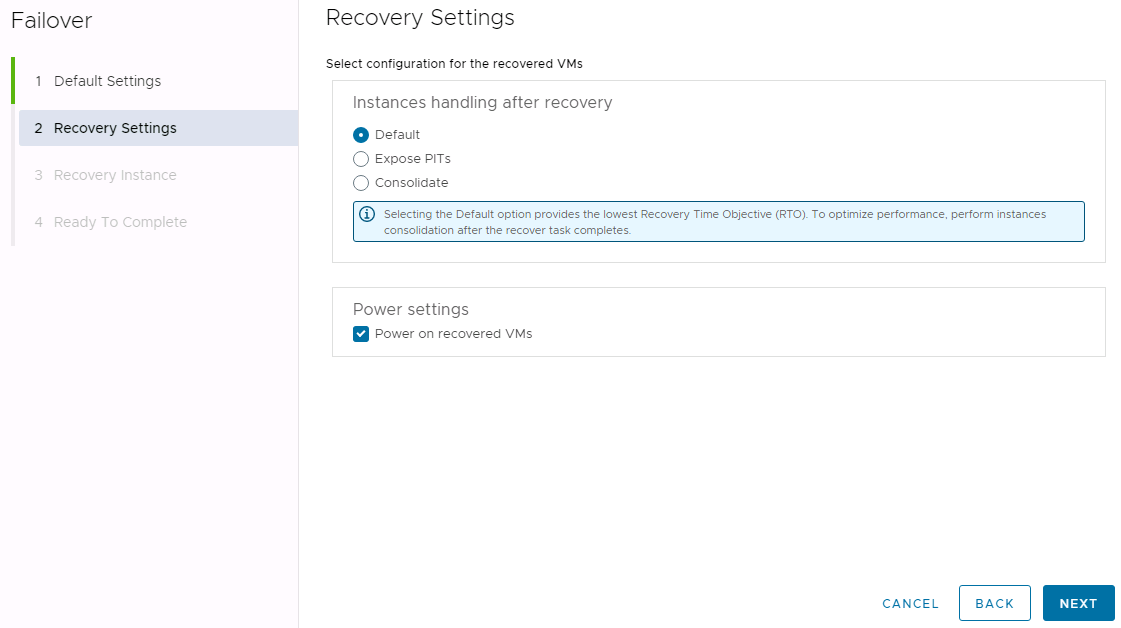
Then click NEXT.
- On the Recovery Instance page, select whether to:
- Synchronize the VM to its current state (i.e., take an up-to-date instance) prior to failing over the VM.
- or alternatively select a previously captured instance to use when failover over the VM.
- Use the graphic to select the instance you wish to use.

Then click NEXT.
- On the Ready To Complete page, review the configuration and click FINISH.
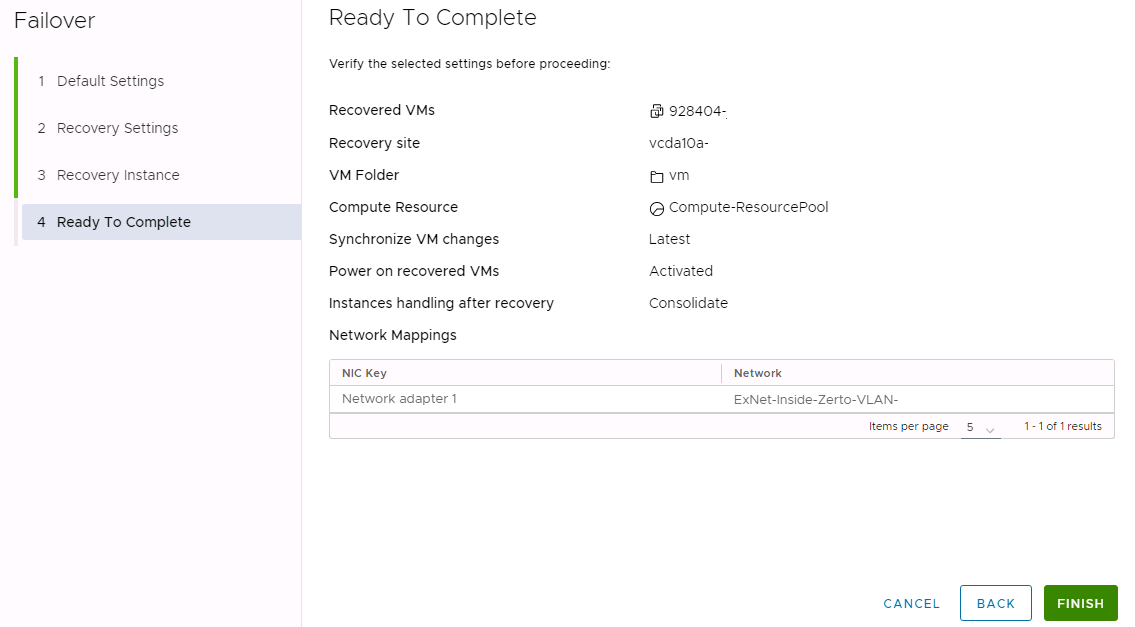
- VCDA will then bring up the VM(s) at the destination site. When it is ready the reported Recovery State of the replication will change to Failed-Over when ready.

The failover over VM will now be available in the vCenter inventory at the destination site.
The source site VM will not be powered off during this operation.
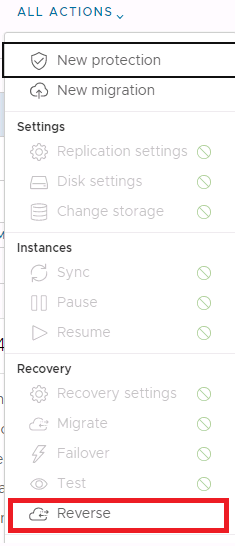
- Once failed over, you have the option of reversing the protection - i.e. replicating back from the original destination site to the original source site.
- With the relevant VM selected in the UI, click ALL ACTIONS and then REVERSE.
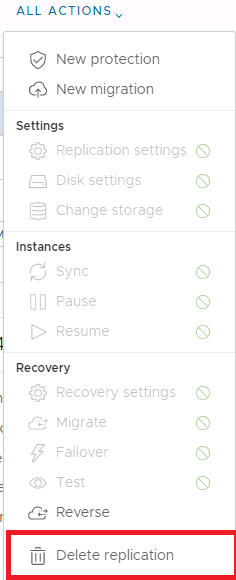
- If replication is not being reversed and you want to remove the replication relationship in the VCDA UI, select the relevant VM, click ALL ACTIONS and then Delete replication.
Updated 5 months ago